This simple Kitchen Tiling Guide is something a lot of people could have done with finding before attempting to tile their kitchen walls or floor.
Hi. Hope you can help me with a few things. I’m new to tiling and to save myself some money I’m planning to tile a kitchen splash back with light grey bevelled metro tile and white grout.
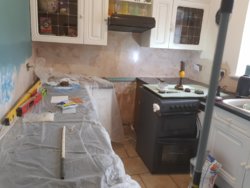
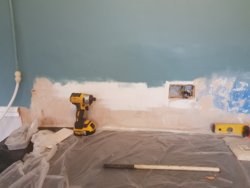
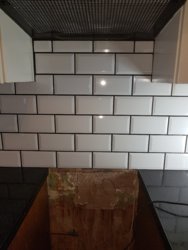
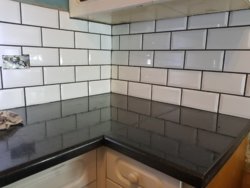
As you can see I have removed the existing tiles, the skirting board which sits on the worktop (not sure of the correct term for this!) and also the stainless steel backsplash behind the cooker hob. How are you finding the kitchen tiling guide now you have read a bit? Came off quite easy and not much damage to the walls – just a few holes to fill.
I will tile the wall to the left behind the sink (just slightly higher than the bottom of the cupboards), along the wall behind the cooker up to the cooker hood and the small bit of wall to the right of the cooker to the edge of the work surface.
Do I need to do anything to the walls that have previously been painted in order to help the tiles stick properly?
Where would be the best place to start tiling? Behind the cooker in the middle and then work upwards and outwards? I understand I’ll need to first lay out the tiles to make sure the cut offs at the edge are not too slim.
Would I just carry the tile on when I get to a corner or would I be best to start again measuring from the centre and working out towards the edges?
Also how do I tackle the small wall surface on the left in the first photo with the outside corner? I presume it’s best to use an edging strip to cover the edge that sticks out but not sure how these work – Would this simply fit over the bevelled edge of the tile?
What are the options to make the top edge and side edges where the tiles end look finished?
When tiling inside corners do you take the tile right up to the end of the wall and then overlap the tile with this on the next wall? If so do you overlap left over right or doesn’t this matter? Is it ok to have bevelled edge to bevelled edge in these corners or best to line them up so that you end up cutting the bevelled edge off?
I will also remove the cupboard pelmets, cut them down and refit over the tile.
Is there anything else I need to consider?
Kitchen Tiling Guide
firstly, the paint should be removed, if possible, you can do this by scraping, washing and sanding – all three are horrible jobs but they are the most effective.
Once the walls are clean and dry, you should then apply a primer to the walls, this should be an sbr or acrylic primer but not PVA.
Setting out is done by judging which is best for the look of the kitchen.
Normally this would be the centre of the cooker and hood, but this would depend on the tile size and the space between the wall unit size.
I personally, do not always continue the bond when going around corners as this can cause more trouble with the visual effect when you have open ends like you have. I would tile the cooker wall first then find the kitchen tiling guide and start with a full tile from the left hand side of your sink wall the full tile from the little wall edge into the corner.
You need tile trim to suit the fattest part of the cut tile….. with metros this is usually about 8mm so get one that is 9mm or 10mm at push, 8mm is ok but maybe a bit tight if you are not used to using tile trims. By the flat L shaped trim.
It is up to you if you want a trim on the top edge of the tiles. Make sure you finish with a full tile though to make it look neat.
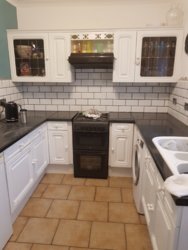
What kept me busy over Easter. How are you finding the Kitchen tiling guide so far?
Few question arose – how does or should one finish around electrical sockets on such tiles ?
The grout did not appear to go as far as the bag suggested (I subtracted 15% from the 4mm gap numbers (gaps are 5mm) ) – 95% of a 5kg Bag of Mapei Ultracolour on just under 4 m2. What depth are they assuming?
The customer wanted the tiles to go higher than the cupboards as you can see from the images, how would others have tiled in that area near the hinge end of the doors?
Kitchen Tiling Guide pictures.
