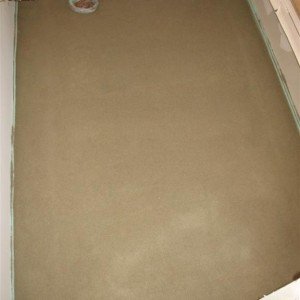
ready for tile

ready for tile

  • Rob Z
  • Oct 24, 2009
  • 0
  • 2
final touch up

final touch up

  • Rob Z
  • Oct 24, 2009
  • 0
  • 0
scraping with the straightedge

scraping with the straightedge

  • Rob Z
  • Oct 24, 2009
  • 0
  • 0
packing in the extra mud

packing in the extra mud

  • Rob Z
  • Oct 24, 2009
  • 0
  • 0
filling in the cavity

filling in the cavity

  • Rob Z
  • Oct 24, 2009
  • 0
  • 0
lifting out the float strip

lifting out the float strip

  • Rob Z
  • Oct 24, 2009
  • 0
  • 0
Float strips ready to be pulled

Float strips ready to be pulled

  • Rob Z
  • Oct 24, 2009
  • 0
  • 0
Floor filled in

Floor filled in

  • Rob Z
  • Oct 24, 2009
  • 0
  • 0
Filling in by the door

Filling in by the door

  • Rob Z
  • Oct 24, 2009
  • 0
  • 0
filling in between the float strips

filling in between the float strips

  • Rob Z
  • Oct 24, 2009
  • 0
  • 0
working across the floor

working across the floor

  • Rob Z
  • Oct 24, 2009
  • 0
  • 0
both float strips set and leveled

both float strips set and leveled

  • Rob Z
  • Oct 24, 2009
  • 0
  • 0
setting float strip

setting float strip

  • Rob Z
  • Oct 24, 2009
  • 0
  • 0
paper, lath and sill seal installed

paper, lath and sill seal installed

  • Rob Z
  • Oct 24, 2009
  • 0
  • 0
R

Small bathroom floor-lath and mortar | Tiling Advice | TilersForums.com

  • 15
  • Rob Z
This is a small (4.5' X 7') bath floor that we floated today. The subfloor was out about 3/4" so we used mud to make a level and flat setting bed for the mosaics that go in next week.
There are no comments to display.

Advertisement

Album information

Album owner
Rob Z
Date created
Item count
15
View count
632
Comment count
0
Rating
0.00 star(s) 0 ratings
Top