T
Tenchman
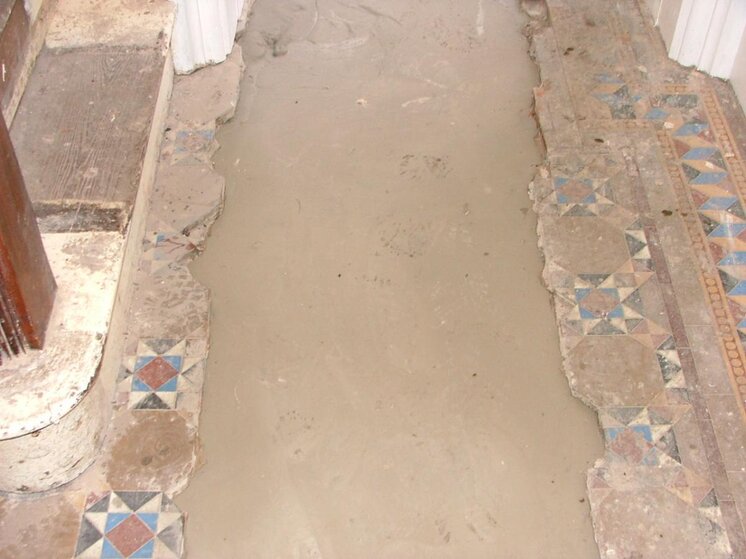
Hi This is a Victorian tiled floor in a detached house. The floor in front of the stairs had been ripped up approx 20 years ago filled in with a mortar mix.
The front porch floor was in better condition. I lifted the front porch tiles to use to restore the main hall floor.
I took out all the sections of filled in screed, replaced with sand& cement semi-dry and then later when that had cured topped up to a level for tiling with ultra leveller.
I took out the threshold as they were loose and also staggered the replacement alternating between plain & patterned tiles so they evened up, otherwise i didn't have enough of the patterned tiles (encaustic) in blue flower.
All the tiles taken up had to have the edges & backs cleaned before re-setting.
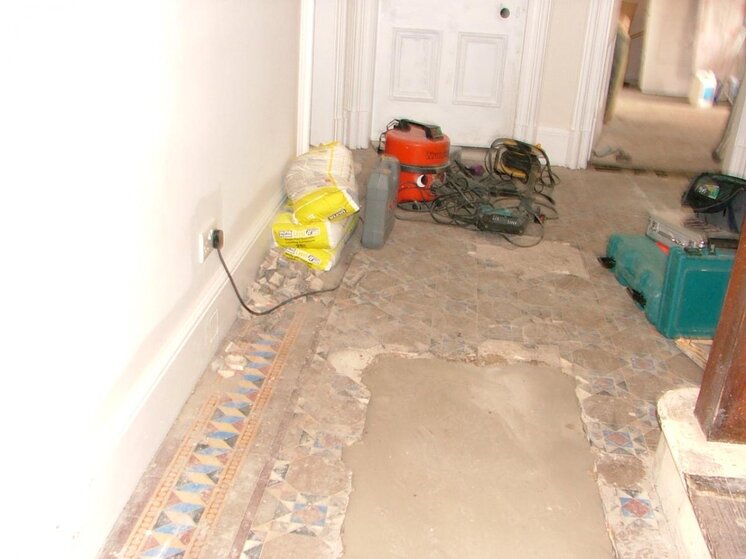
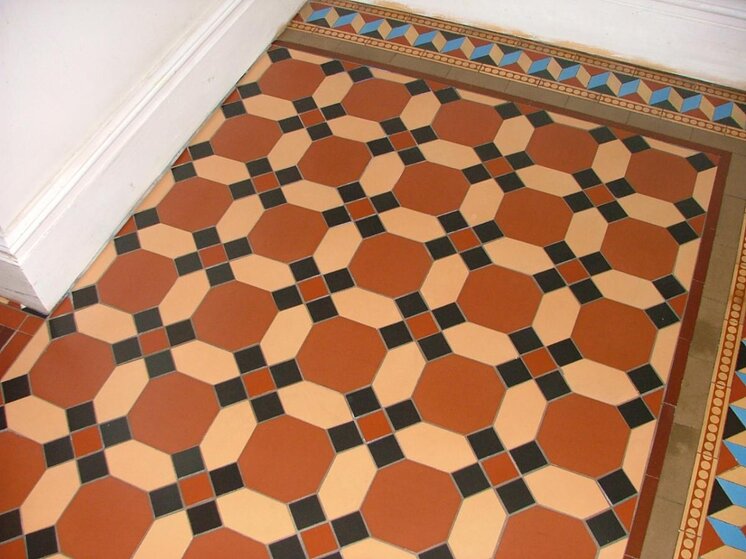
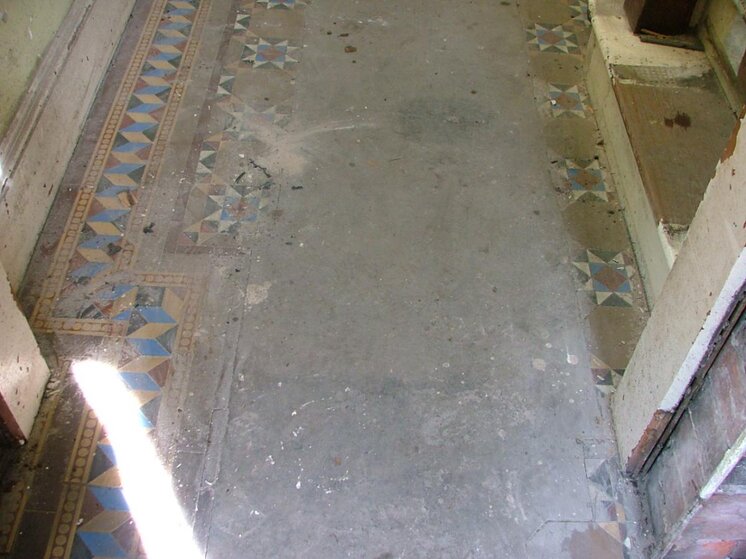
As you can see from the pics the floor was a mess, i used a completely different pattern to restore the porch and used a bridging design between the old floor & new porch.
As always with a restoration contract there is more invisible work than you can imagine from just looking at the finished contract.
I'm not sure i can arrange the pics in chronological order but you can easily see the changes from beginning to end.
Hope this helps to show what the vast majority of my work consists of .
Cheers Steve
Notes from contract.
Late Victorian Encaustic & Geometric Tiled Floor.
The above floor consisted of a small porch at an angle to the main floor, the porch floor was in good to fair condition some damage had occurred through movement = porch had shifted on it’s foundation’s causing a large amount of movement internally through both the floor area and could be seen in shift externally in the brick-work also the stone & brick steps to the property had come adrift of the main building.
Due to this movement a fair amount of the tiled floor had been removed from the foot of the stairs extending a distance through the main field tiles seen as rectangle in the following pictures.
Another section of flooring square in shape had been removed and infilled this is at the threshold of what will be the kitchen and in front of what is now a downstairs toilet.
Both of the sections missing had been filled with concrete to a depth of over 80mm, the rest of the tiled floor was heavily soiled and was covered also in paint splashes /carpet adhesive and various other marks & stains so much so that some of the colours were hard to verify without some cleaning to confirm colours to match with either new or reclaimed tiles.
P2.
Floor restoration always starts with preparation, which in this case meant removing all the broken loose tiles prior to sorting out those that could be kept, these tiles would then have the edges & back cleaned of any adhered mortar, a dirty time consuming job and one of the many “invisible “jobs that need to be done to produce an end result that looks as if it is a well looked after floor rather than a floor most people would consign to a skip!
After all the loose sections have been tidied up (this has to be done otherwise loose tiles which are re-useable can be broken) the next job was too remove the concreted sections, removal was carried out with heavy duty Makita mini- kango type drills.
Other sections removed Inc all the field tiles in the porch, these were cleaned up as described above to be used in the main floor.
A section of border between the porch floor and main floor = doorway section had suffered heave from the dropped porch section all of those tiles were taken up so that a new screed could be laid to flatten out the large hump.
Also the border tiles taken up were used to replace the missing section in front of the downstairs toilet door.
The threshold tiles in front of the kitchen door had been removed so the dining room threshold tiles (which were loose) were removed to allow the threshold tiles to be reset replacing missing blue/white/black encaustic tiles (patterned tile) with blank black tiles, this preserves the look both aesthetically & in symmetry .
The field tiles in the porch were replaced by new floor tiles cut into a traditional pattern and complement the main floor by connecting through a similar shaped main tile.
A new connecting threshold pattern was cut & laid between the two floors mirroring the main field tile design with a subtle colour way difference.
Once all the tiles had been cut and the new screeds had dried it was a matter of beating the new tiles & reclaimed tiles into position given the enormous amount of damage there had only been a small amount of creep over the years so very few tiles had to be custom cut to fit back into position but there were a few that had to be cut to size,
As usual in an old floor there are lots of mistakes by the original fixers this is quite common given they would only have either natural light of which there is precious little or they would have been using oil or gas lamps so it’s not surprising that tiles are out of sequence upside down or the wrong colour!
Rescreeding the missing sections took well over half a ton of material, the original floors were laid over a lime based screed which in turn was tamped down over foundry slag and hard core amongst which they had thrown the debris of a building site of that era, = horse manure/broken clay pipes / dottle from same/ wood shavings/ nails & bits of lead/ and general rubbish.
I enjoyed the challenge of bringing this floor back from a dirty broken remnant to a vibrant beautiful addition to the character of the house.
Attachments
-
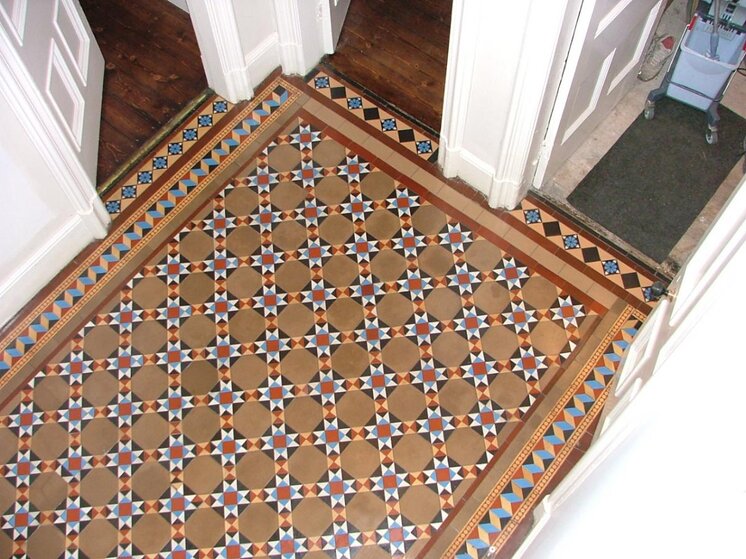 reset threshold &floor.jpg179.8 KB · Views: 85
 -
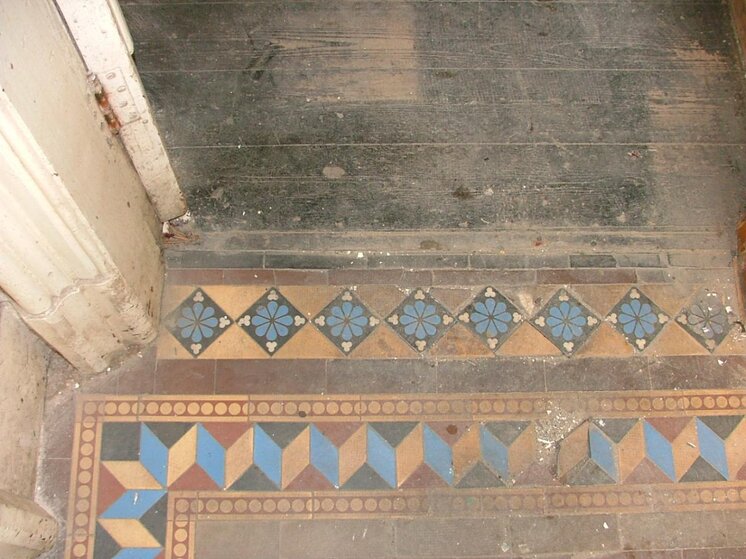 door threshold before.jpg158.5 KB · Views: 80
 -
 door threshold after.jpg154.4 KB · Views: 79
 -
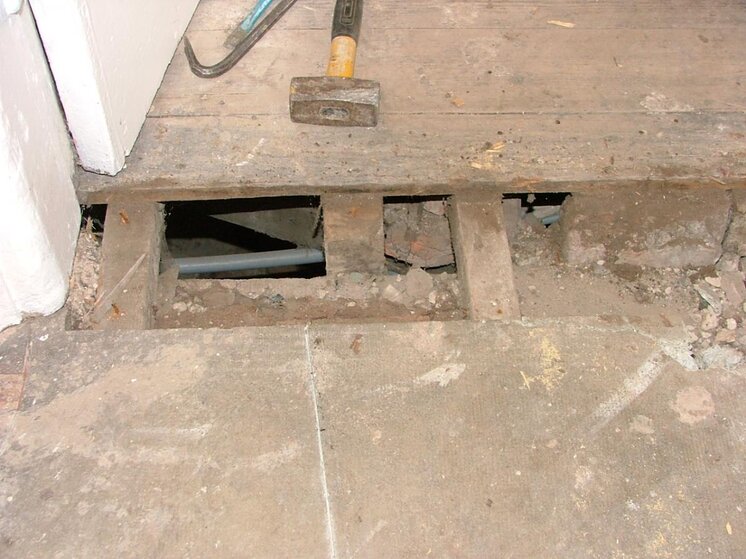 thresholdworkkitdoor.jpg149.1 KB · Views: 77
 -
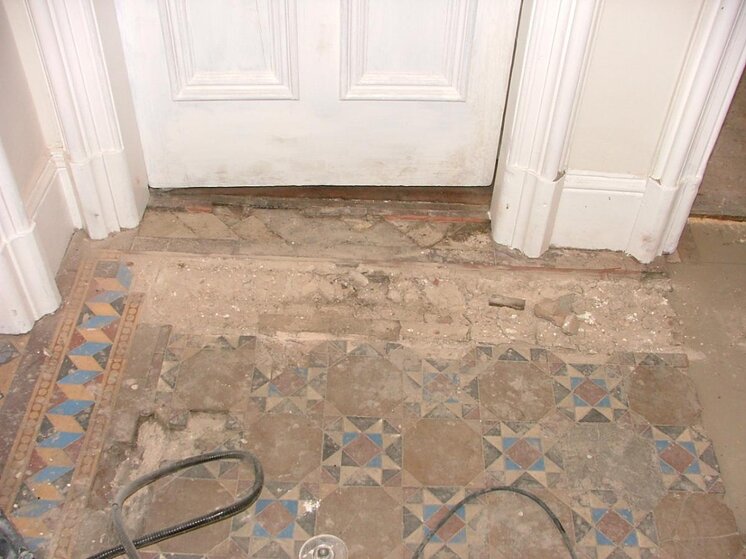 prior ro rescreeding.jpg123.7 KB · Views: 81
 -
 bottomofstairs b4.jpg104.8 KB · Views: 77
 -
 mainfloor damageb4.jpg93.9 KB · Views: 76
 -
 bottom of stairs after.jpg139.5 KB · Views: 81
 -
 porch after.jpg117.9 KB · Views: 72
 -
 main floor after.jpg152.2 KB · Views: 73
 -
 kitdoor screeded.jpg94.1 KB · Views: 70
 -
 MPhallb4.jpg124.6 KB · Views: 70
Last edited by a moderator:

