Discuss DIY Diary in the UK Tiling Forum area at TilersForums.com.

J

jimbob

I joined this forum a few months back to ask a question about trowels, and I've pestered you all ever since about my proposed tiled floor with UFH, so its only fair I share my experiences with all those who have helped :thumbsup:
Hopefully any newbies will also gain some tips from my mistakes and tribulations.....I'll do this over a number of posts this week as my computer takes an age to upload photo's :mad2:
Planning
Back in June/July my wife declared she wanted the hall and kitchen floor tiled with UFH beneath. "On yer bike" says I, so we sat down to discuss it and finally agreed she was right :incazzato:
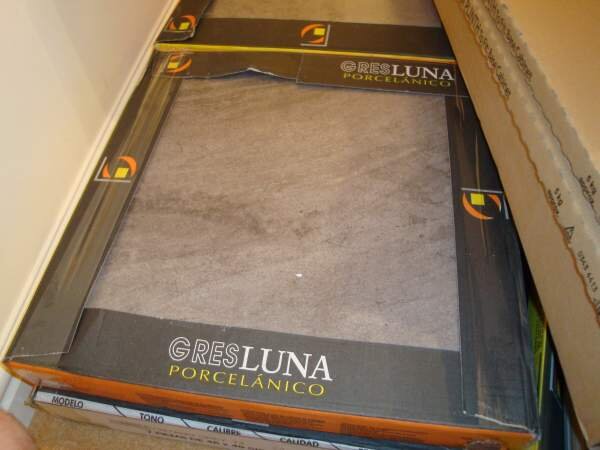
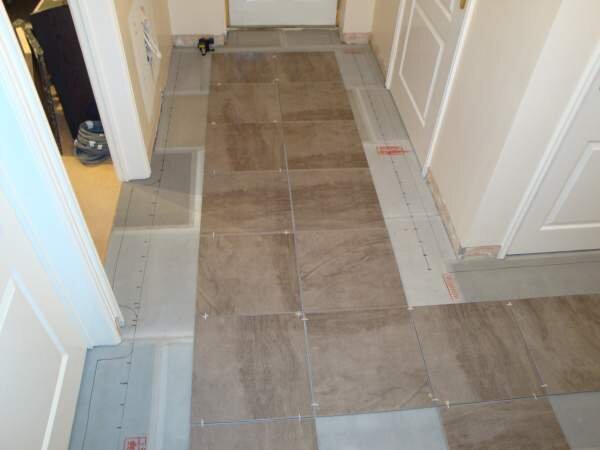
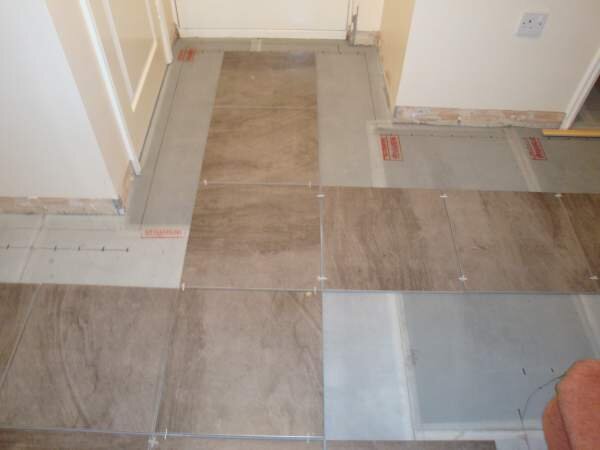
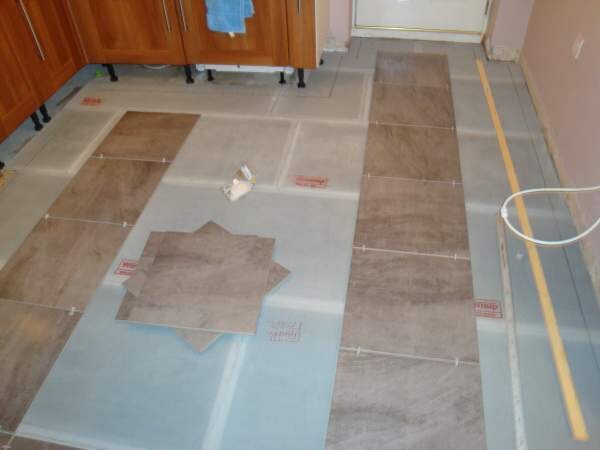
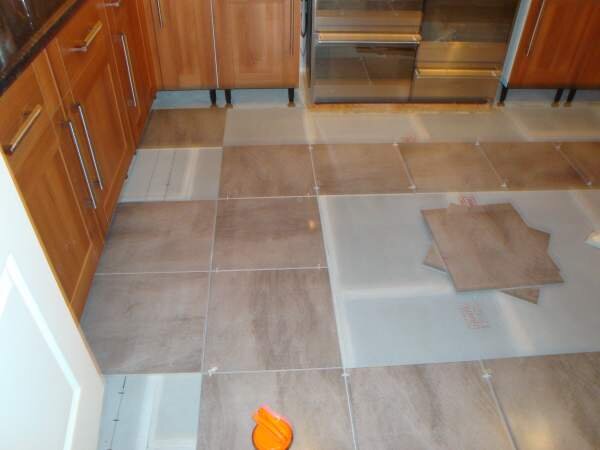
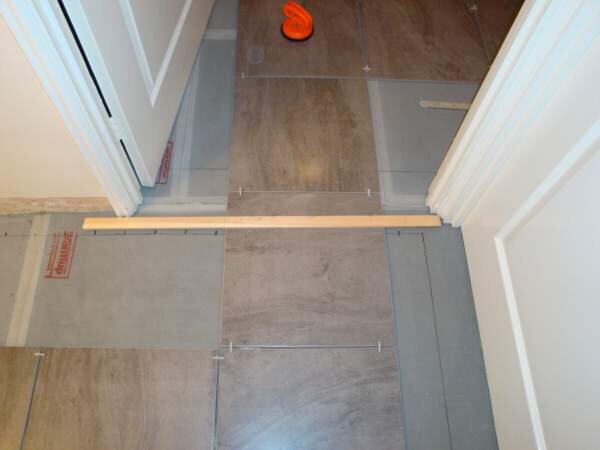
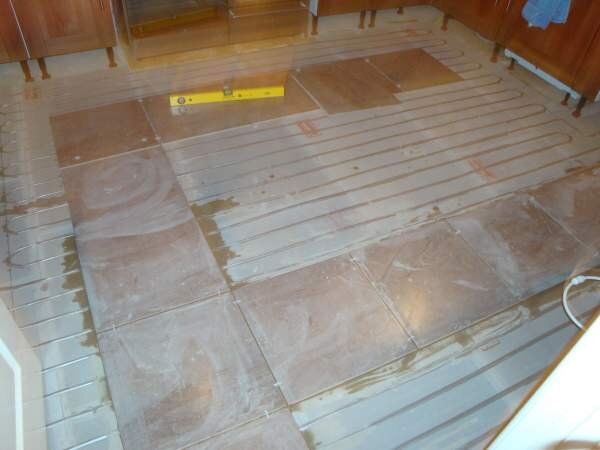
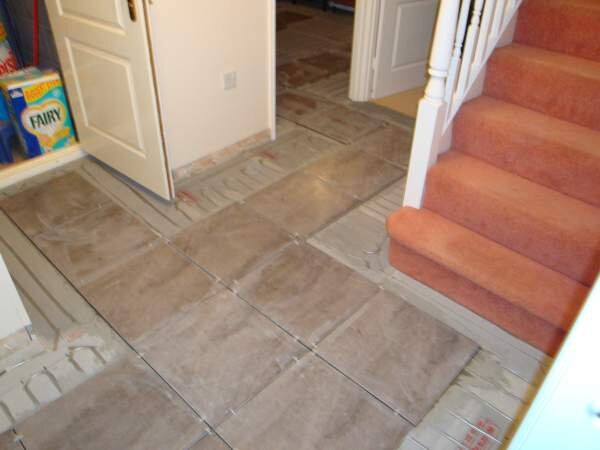
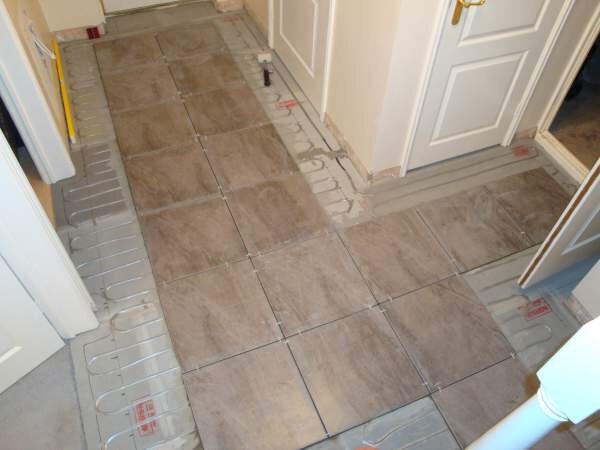
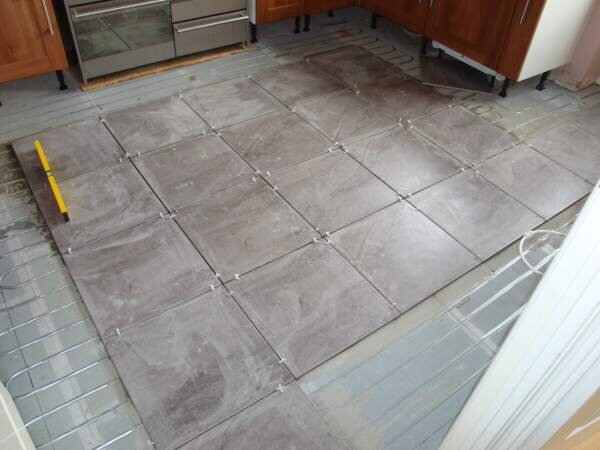
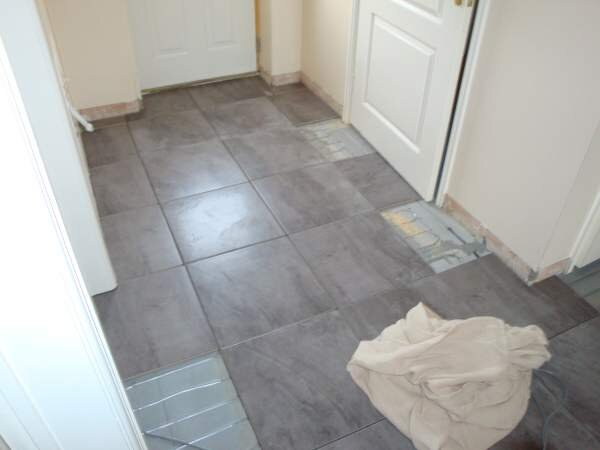
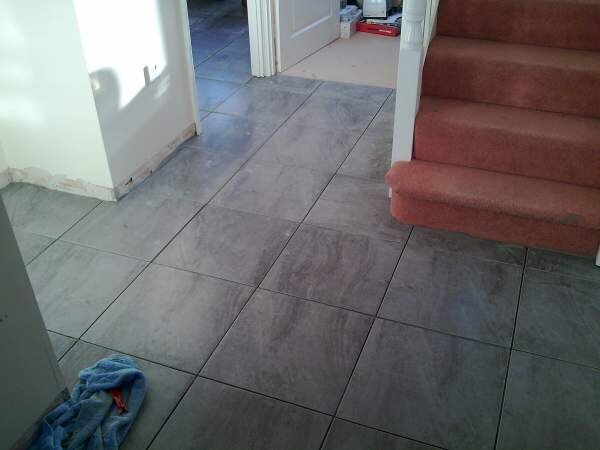
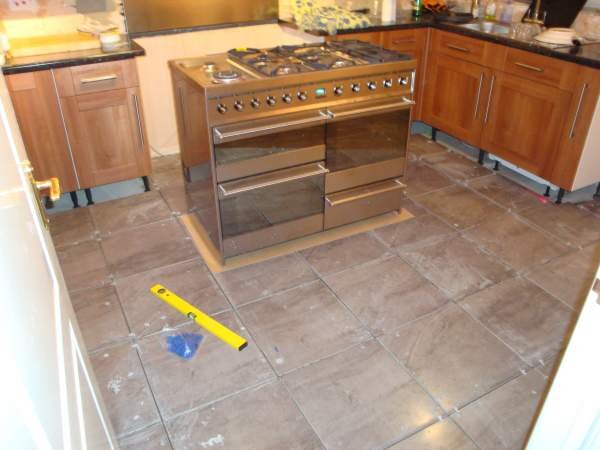
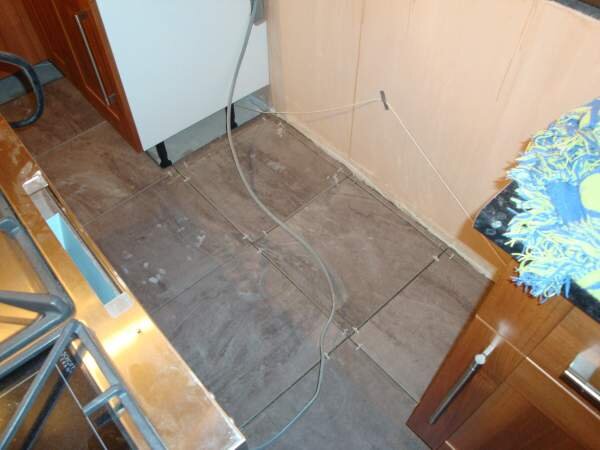
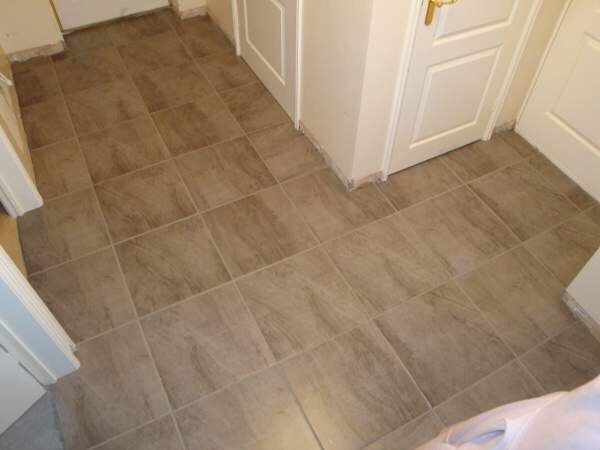
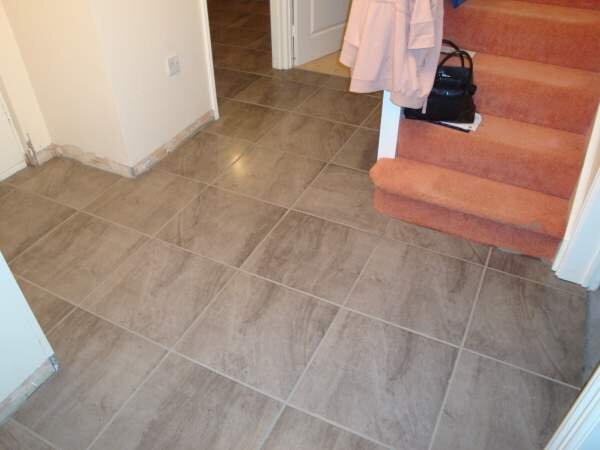
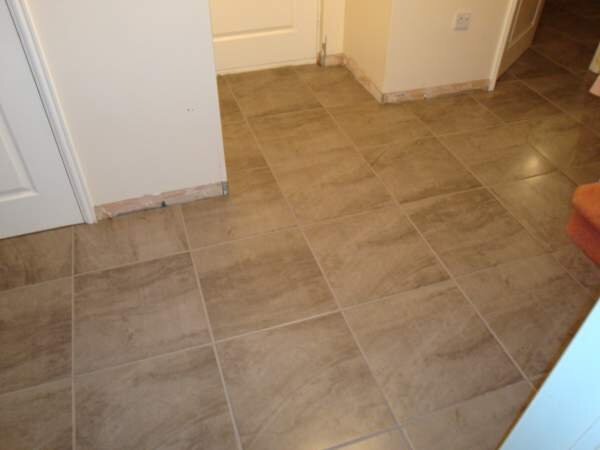
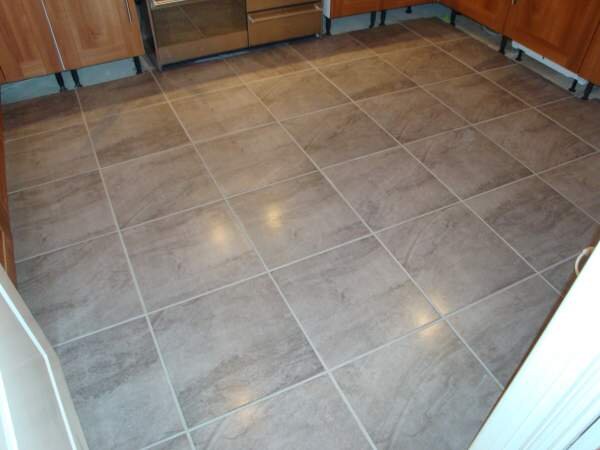
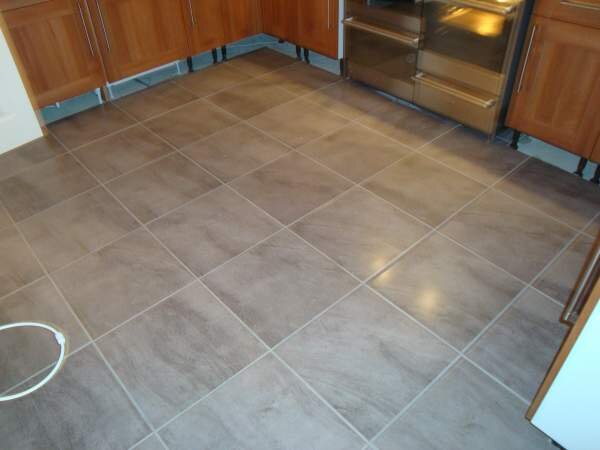
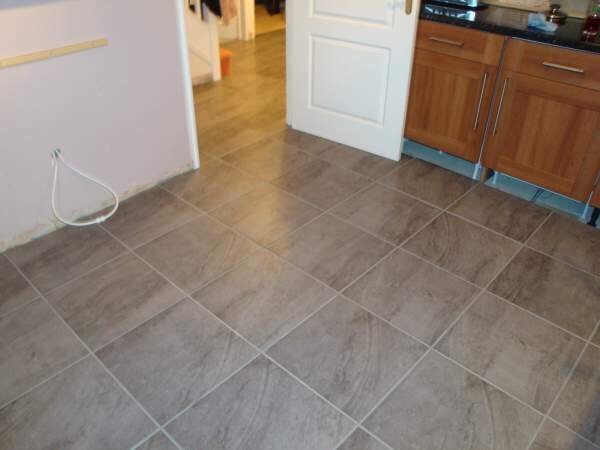
After a bit of shopping around she, sorry I mean we, picked out some porcelain tiles, 450mm x 450mm, 9mm thick, Gresluna Porcelanico Yin Yang in slate grey effect, at £23 per square metre (reduced from £29) - see pic.
Kitchen excluding units is about 8 square metres and hallway is about 8 square metres.
We bought the tiles and took a couple of fitters business cards from the shop. Some time over the next couple of weeks my wife suggested I do it myself - we both laughed. I have a reputation in my family at being useless at DIY, especially with my mother after she walked in to my bedroom once when I was a young child to find I had stripped my alarm radio down to its many different parts and couldn't then put it back together. She has a long memory, my mother. Anyway, I digress.
Somehow we warmed to the idea of me giving it a bash, if nothing more than to save money during times of recession. Having never laid a tile in my life (or never even cleaned one for that matter), I began getting the heeby jeebies, so decided I needed a little course to get me started. A quick look round this site and I promptly booked on the NETT 4 dayer.
That went well, but by this time I was beginning to realise this wasn't going to be quite so cheap as I anticipated due to the equipment needed to do the job properly. Having already forked out for my course, there was no going back :yikes:
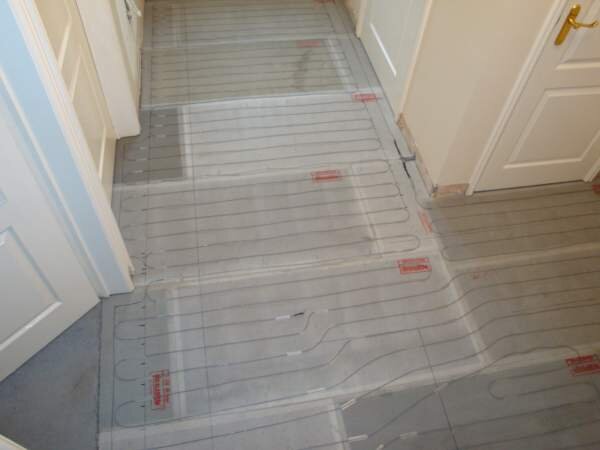
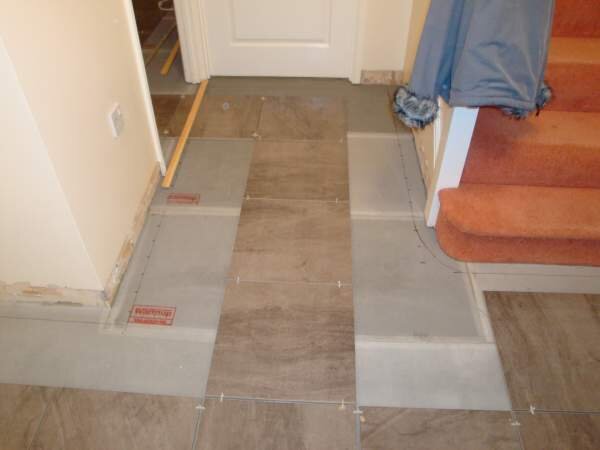
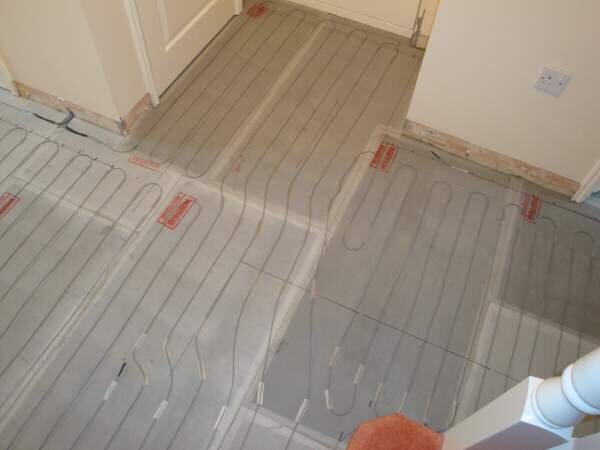
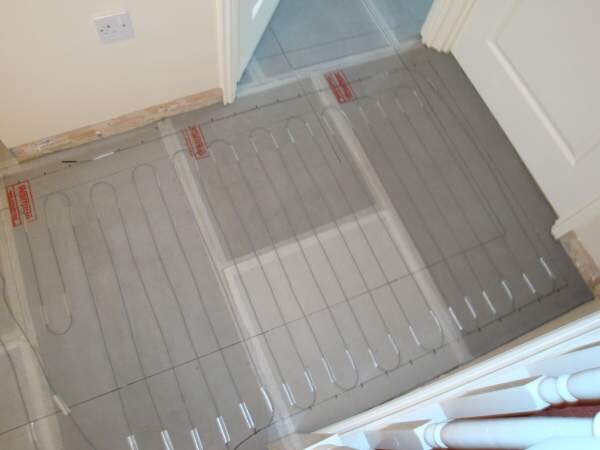
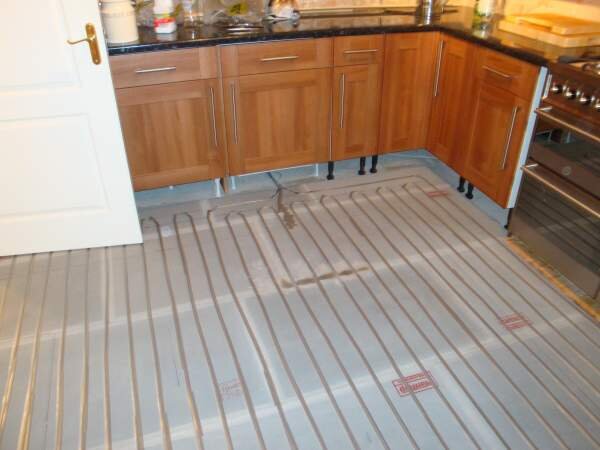
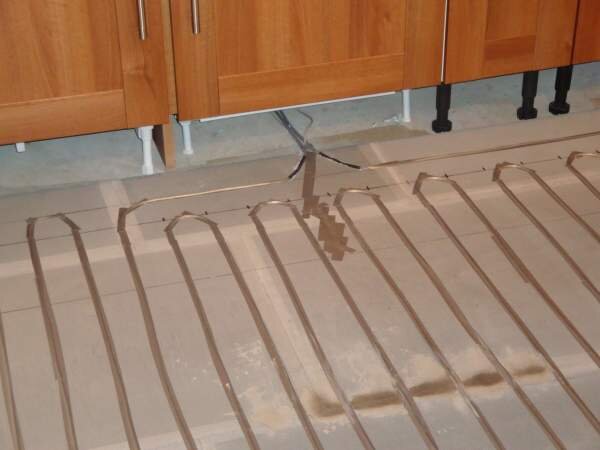
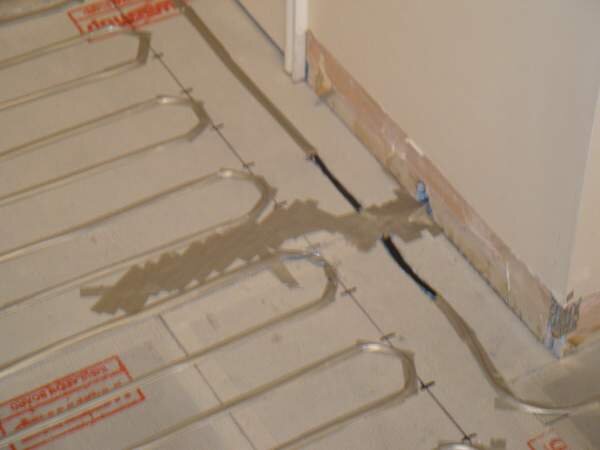
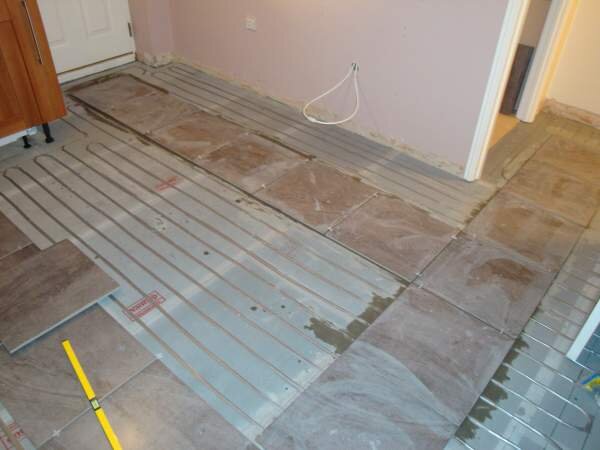
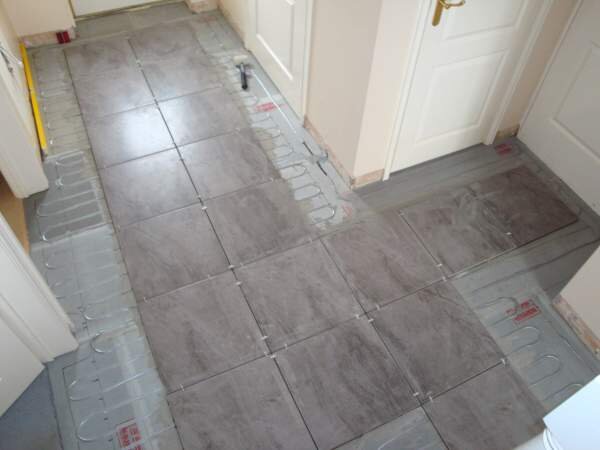
Finally we managed to get the UFH - my missus works for an electrical contractor and they got us Warmup at trade prices, including the insulation boards. We went for the loose wire system as our hallway is a bit of a dog leg type shape.
Preparation
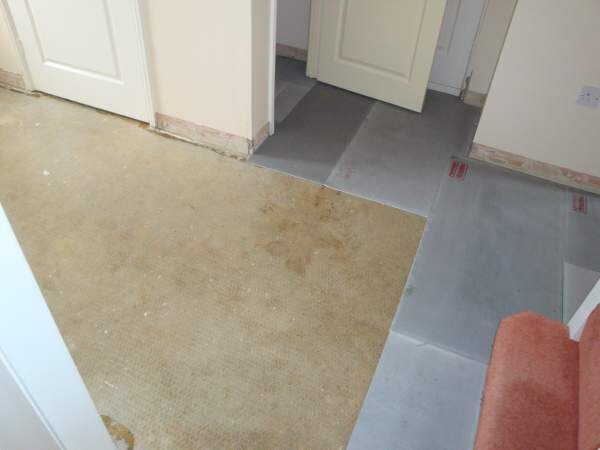
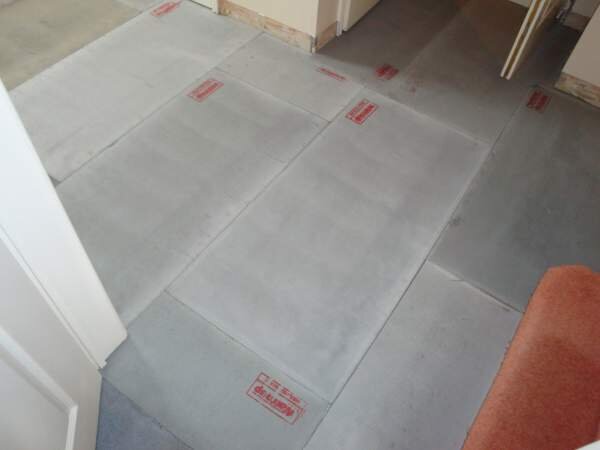
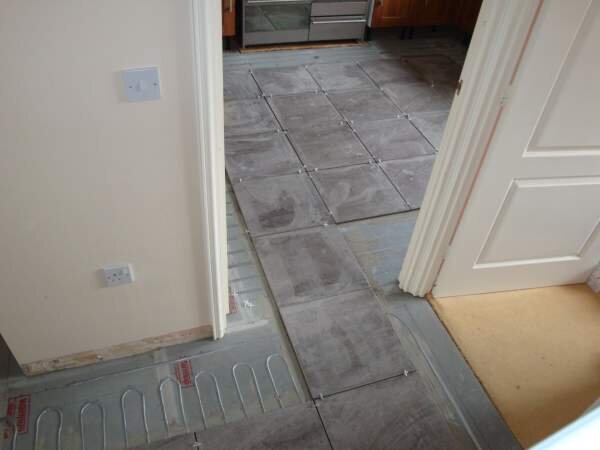
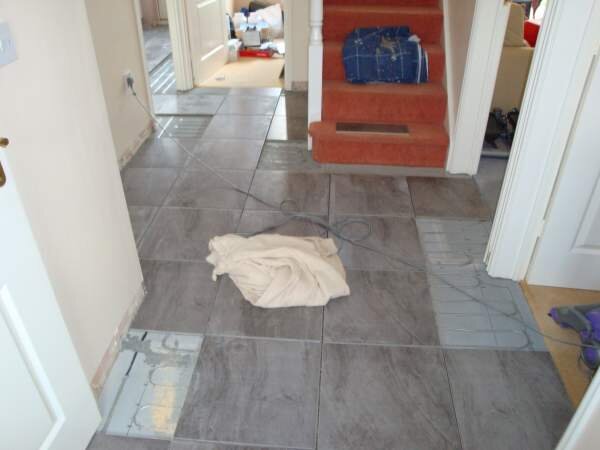
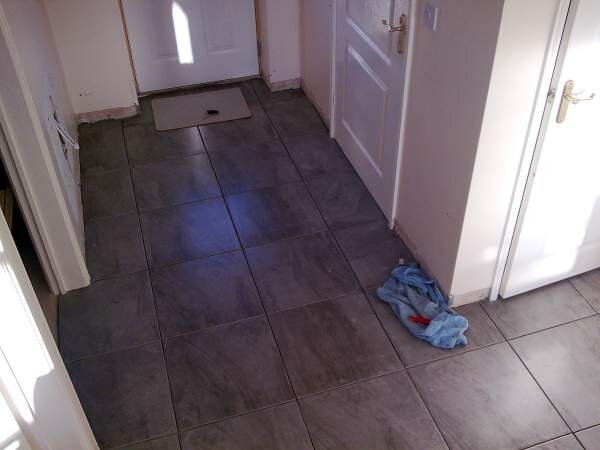
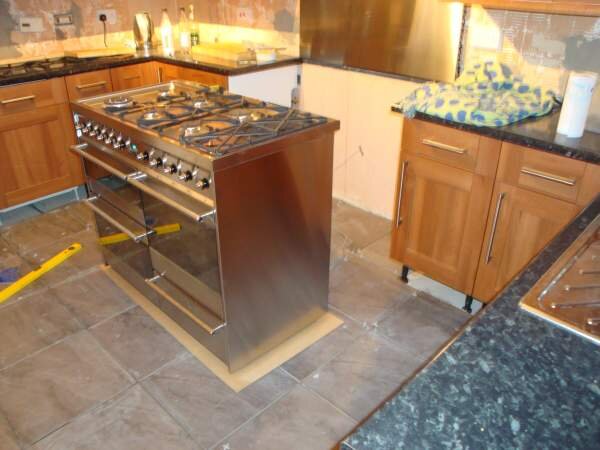
Kitchen floor was nice smooth concrete under the original laminate wood. Hallway was carpeted but with same concrete underneath. Laminate was ripped up and carpet, and all carpet grippers (well glued) were pulled up too. Used my gundlach scraper to make sure all adhesive was removed, then used Everbuild SBR Bond from Tradetiler to prime the floor - 2 coats, one lengthways the other widthways to ensure full coverage
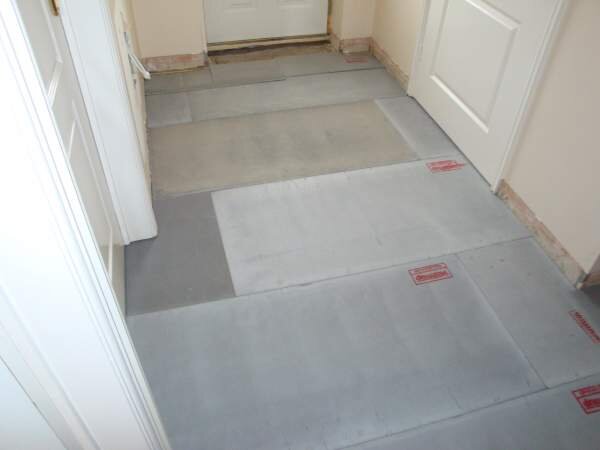
When ripping up the carpet grippers near the front door a fair bit of concrete came up too - must have been loose - so got hold of some Mapei Ultraplan Maxi SLC, hoovered and primed the hole as best i could a filled it with the SLC. Once dry, primed the SLC as well. Bish bash bosh, prep done.
If anyone is still awake I shall continue this on another post.....:yikes:
 

Attachments

  • diary1.jpg
    48.9 KB · Views: 70
J

jimbob

Work - stage 1
First job after floor prep was obviously to cut and install insulation boards.
Started on the saturday morning and it took me all day, plus half of sunday to complete. Boards were cut using stanley knife (simple enough), and well bedded into Mapei Keraflex Maxi adhesive, trowelled on with Rubi 8mm square notch trowel. All board joints were staggered - see pics.
I tried using knee pads during this process, but couldn't get along with them, so just knelt on the bare concrete ALL DAY! Needless to say on Sat night my knees were a little sore, my back was in pain, my shoulders and neck were sore and i was getting blisters.
Lucky me my ailing body could recover during the week with my boring desk job. All I needed to do was scrim tape the joints with the tape provided - easy peasy. Plus mark off a perimeter of 50mm from the wall all round, and make markings on this perimeter for the wire spacings needed to lay the UFH.
Work - stage 2
Next weekend I was planning to lay the UFH wire. Before this I wanted to sort my layout, so on the Fri night I dry laid the tiles in my hall and kitchen. I had originally intended on setting out each room separately, but as luck would have it the hall layout ran beautifully into the kitchen with only one or two minor compromises, so I decided to have the tiles run through - see pics. I used a marker pen to draw round the dry laid tiles, before putting them all away again.
Sat all day and half of Sunday I laid out the wires to the markings I had previously made - see pics. Luckily my spacings were pretty much spot on so I didn't need to rip up and alter the spacings in either room. Just spent hours taping down the entire length of wire - what a pain in the behind that job was :mad2:
I had booked the following week off work, so the next day was my planned start day for tiling. We had a bit of a height issue with the floor, so we had only used 6mm insulation boards and I was going to tile directly over the wires with no SLC first :yikes:
I had managed to spend a small fortune in tools - Rubimix 9 BL mixer, Norton Clipper wet saw, and a Rubi TX700 (not N) that I picked up from ebay for £220 pretty much brand new, with a Rubiclean Washboy thrown in free. Looking forward to using these babies.
Tomorrow boys and girls I shall be plunging into the deep end with my tiling experience....:yikes:
 

Attachments

  • diary2.jpg
    35.8 KB · Views: 60
  • diary3.jpg
    32.3 KB · Views: 61
  • diary4.jpg
    32.4 KB · Views: 60
  • diary5.jpg
    39.4 KB · Views: 61
  • diary6.jpg
    35.3 KB · Views: 59
  • diary11.jpg
    37.8 KB · Views: 63
  • diary10.jpg
    38.7 KB · Views: 62
  • diary9.jpg
    41.2 KB · Views: 54
  • diary8.jpg
    37.4 KB · Views: 58
  • diary7.jpg
    36.8 KB · Views: 60
  • diary12.jpg
    38.6 KB · Views: 51
  • diary13.jpg
    37.6 KB · Views: 55
  • diary14.jpg
    49.5 KB · Views: 60
  • diary15.jpg
    50.6 KB · Views: 61
J

jimbob

Before I go on with the tiling, one thing I didn't mention was on the Sunday I also spent a little time chiselling grooves in the insulation boards for the cold tails, the joints between the heating wire and the power supply, and the floor probes. We didn't have enough floor height to put the probes into flexi conduit so as a next best thing I placed the probes (2 in each room - 1 as a backup) into the grooves and taped over them - see pics. Should both probes fail I shall have a 50:50 chance of pulling them out and inserting a new one......

Right, now for the working week, starting with....

Monday
Up and raring to go by 8.30am, fully fit except the tips of my fingers which were hurting after taping down 176 metres of wire over the weekend! Before I started I had 3 doors to trim down, so I went to work. Used a Roberts Jamb Saw so I could trim them in situ without removing. Powerful little beast it was, and a hell of a lot of mess made but did the job well. Only hiccup was I got a kickback on one of the doors and lost control of it for a second, and it ripped into one of the wires, tearing the tape off. :yikes: Hastily got my multimeter and checked resistance and phew, no damage to wire itself. My week nearly went belly up in the first hour!
Cleared up all mess after door trimming and dry laid field tiles once again, (making sure all arrows on the back of the tiles were pointing same way) to make sure I didn't deviate from my original layout. Mixed up my first batch of adhesive and away I went, using a 10mm u notch Rubi trowel.

Discovered straight away it was going to be a long job. It's a little tricky trowelling over the wires, but I had my trusty Uheat installation monitor hooked up so I knew if the wire got damaged. Great piece of kit, but it meant that I couldn't have any music on, so it was a pretty lonely day.

If I had the normal UFH mats, I think i would have self levelled, but as the loose wire is only 2mm thick, with a little care i was able to set my trowel with the wire runs between the notches. I was also paranoid about 100% coverage and avoiding hollows which would lead to hotspots, so I back skimmed EVERY SINGLE TILE!

The other thing I learnt that day is that not all tiles were equal size - some only out by 1 or 2mm, but its enough to throw the spacings out and prove a right pain in the proverbial :mad2:

Almost 7pm I finished, all field tiles in hallway laid and one row in kitchen completed (see pics - those tiles at the top of the first kitchen photo with the spirit level on are only dry laid still)

10.5 hours work :yikes: - I could never make any money at this game!
 

Attachments

  • diary20.jpg
    46.1 KB · Views: 47
  • diary19.jpg
    45.3 KB · Views: 49
  • diary18.jpg
    47.1 KB · Views: 49
  • diary17.jpg
    43.1 KB · Views: 48
  • diary16.jpg
    35.3 KB · Views: 47
  • diary21.jpg
    47.4 KB · Views: 44
  • diary22.jpg
    42.2 KB · Views: 52
J

jimbob

Tuesday
Up bright and early again. Took me about 20 minutes to get my socks on as I could hardly move my knees.

Target today was to finish off rest of field tiles in the kitchen. This I managed in about 3 hours, so that by lunchtime I was finished. Popped over to Tile Giant to pick up some more Keraflex Maxi as it was obvious I would need more at the rate I was going through the stuff.

Did a little plumbing to fix a leaking bath upstairs in the afternoon, then went to pub for a carvery - gammon, turkey, roast spuds, cauliflower cheese, carrots, yorkshire puds, gravy mmmmm:drool5:

Relatively easy day compared to Monday :thumbsup:
 

Attachments

  • diary24.jpg
    49.3 KB · Views: 50
  • diary23.jpg
    38.9 KB · Views: 41
J

jimbob

Wednesday
Hallway tiles laid had now had the required 24 hours drying time, so today it was a case of doing all the cuts. First of all, measured the height of the tiles which were already laid, transferred the height plus 1mm to the architrave on each doorway, and used my Fein Multimaster to trim the architraves so the cut tiles would fit nicely underneath.

Once this was done, set the TX700 up in the living room and the Norton Clipper up in the back garden, and started cutting away, dry laying each cut tile as I completed it. I'll do a review of these cutters in the tools section so I won't bore you with details here.

Hallway involved quite a few cuts, so took me most of the day which was longer than I had intended, although I wasn't exactly rushing. Luckily it was bright sunshine outside and 18 degrees so it was a pleasure. Not sure where I would have set up my wet cutter if it had been peeing it down though. Most difficult cut was the curve round the bottom step of the stairs - took me a while to knock this one out. Used some paper to mark out the curve, cut it out with scissors and placed it on the tile to transfer the curve. Then used a combination of 10mm scoring wheel inside a wooden handle (freehand) to score along the curved line, wet cut up to the curve in several different places, and used nippers to break small bits off at a time. Found it a little tough going using nippers on porcelain, but got there in the end :thumbsup:

Nice straightforward, 9 to 5 day :thumbsup:
 

Attachments

  • diary25.jpg
    37.3 KB · Views: 46
  • diary26.jpg
    43.1 KB · Views: 44
J

jimbob

Thursday
Another lovely day. Kitchen tiles all dry now, so moved the cooker out from its position (I had sat it on 18mm chipboard when the kitchen was being fitted so that the height of it was approx the same as the tiled floor was going to be). Also made it easier to pull it out on my own - placed some hardiebacker on the UFH wires which were still exposed so the cooker didn't damage them. Once the cooker was safely in the middle of the room, cut and laid insulation boards in the space where it had been, using 8mm trowel as before.

Then started to do all cuts in kitchen. These should have been quick and easy because the majority of them were straight cuts, with the odd L shaped thrown in. All the straight cuts along the wall though, only needed 10-20mm cutting off (wall was not square, obviously), which was a little too fine for the TX700, so had to wet cut each one :mad2:

Finished the cuts by lunchtime. In the afternoon started laying the hallway cuts I had dry laid the previous day. Found this even more slow going than the field tiles, especially around each doorway, but got the hallway finished by 5ish so all was good.

Had a little mishap though - was a little careless with my bucket trowel when laying one of the cuts and chipped one of the tiles which was already laid :yikes: - luckily it is a very small chip and not visible unless you know it is there - especially as the slate nature of the tiles tends to hide it, so felt a bit lucky and learnt a valuable lesson - keep metal objects well away from tiles!

One more day of laying to go, and not before time as my body feels like it has been battered by a freight train!
 

Attachments

  • diary31.jpg
    27.4 KB · Views: 50
  • diary30.jpg
    29 KB · Views: 46
  • diary28.jpg
    57.4 KB · Views: 43
  • diary27.jpg
    53.2 KB · Views: 43
J

jimbob

Friday
Last day of laying today, and looking forward to getting it all done!

Not much to say about today, other than it went pretty much without a hitch, although I'm not getting any quicker at laying!

As you can see from the pic, the only really dodgy cut I have is right behind where the cooker is going so it will never be seen.

Saturday
Gave the floor a clean with a cloth and water, ready for grouting, pencilled in for Sunday. I'll leave that for tomorrow though, along with the finished pics :thumbsup:
 

Attachments

  • diary29.jpg
    50.9 KB · Views: 53
J

jimbob

Sunday
Grouting time. I did a bit on the Saturday actually, where the cooker was going and in a little closet off the hallway which I had tiled. Wanted to have a go in a couple of areas which weren't to be seen, as I was using Mapei Ultracolour plus and heard that it could be temperamental.

113 - Cement grey, was the colour.

Did the kitchen first (after moving the cooker back into its place), and started off by measuring out the bag into 1kg batches using some kitchen scales. Between 200 and 250ml water in each batch, and mixed as per instructions. Wiped the excess off the tiles after batch was used with a damp sponge and emulsified the joints, then waited 20 mins or so before a final washdown with washboy.

By the end of the kitchen I was confident enough to up my batch sizes, and did the hallway in 2kg sizes, and finished it in half the time of the kitchen.

Gave it a final wash down after a couple of days and went over the grout joints with Seal Guard to prevent any future staining.

Finished article - see pics (new skirting yet to be put on, along with kitchen unit kickboards and end panels, obviously).

Conclusion
Its tough work, floor tiling, and by the end my joints were in tatters. God knows how you guys do it day in day out. I'm pleased with the final result - took me much longer than a pro and the result is doubtless not as good as a pro could achieve, but I've learned a lot, and if I was to do another floor next week, I'm confident I'd be able to improve on little bits here and there.

For any DIYers thinking of doing it, one word of warning: it may well cost you just as much as getting a pro in, along with more stress etc, so only do it if you want a new skill set as well for the future. Most DIYers (myself included) do not consider the cost of the tools needed to do the job properly when deciding whether to get a pro in, so give it some thought!

Thanks to all on this forum for the info and expert advice, as well as Darren at NETT. On to the kitchen splashie now....

Jimbob, over and out. :thumbsup:
 

Attachments

  • diary32.jpg
    39.5 KB · Views: 55
  • diary33.jpg
    42.1 KB · Views: 53
  • diary34.jpg
    35.3 KB · Views: 54
  • diary36.jpg
    44.3 KB · Views: 57
  • diary37.jpg
    42.9 KB · Views: 56
  • diary38.jpg
    41 KB · Views: 54

Reply to DIY Diary in the UK Tiling Forum area at TilersForums.com

There are similar tiling threads here

I had a small leak in the main water line before the stop tap in my 1950s house. The copper pipe...
Replies
1
Views
1K
Hi, I'm trying to assess what prep is needed on the walls for my kitchen backsplash. We'll be...
Replies
6
Views
2K
    • Like
Hi, Can't seem to find a solid answer as I realise so much depends on multiple factors. I'm...
Replies
0
Views
2K
    • Like
Hello: First time posting. Looks like a really good forum for Info. Here is my question: I'm...
Replies
0
Views
937
Hi, I'm new to the forum and fairly new to tiling, my only previous "proper" job was my recent...
Replies
3
Views
2K

Trending UK Tiling Threads

UK Tiling Forum Popular

Advertisement

TF Group Please Join

Thread Information

Title
DIY Diary
Prefix
N/A
Forum
UK Tiling Forum
Start date
Last reply date
Replies
20

Which tile adhesive brand did you use most this year?

  • Palace

  • Kerakoll

  • Ardex

  • Mapei

  • Ultra Tile

  • BAL

  • Wedi

  • Benfer

  • Tilemaster

  • Weber

  • Other (any other brand not listed)

  • Nicobond

  • Norcros


Results are only viewable after voting.

You're browsing the UK Tiling Forum category on TilersForums.com, the tile advice website no matter which country you reside. Our UK based online tiling forum has 48,000 members and started out in 2006.

Top