Tilers Forums Official Sponsors

Hi Al 🙂

No point rushing it if there isn't any need to!

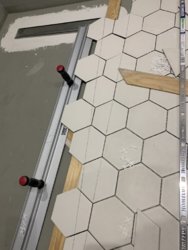
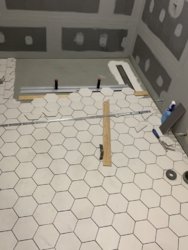
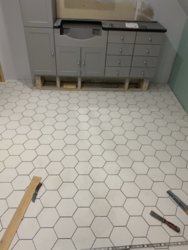
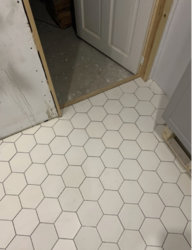
I wouldn't see any issue in using those. My only suggestion would be with them being a matt white perhaps test grouting on an offcut that the grout doesn't stain especially if you are using a darker grout. A temporary sealer might be best with it being your first time grouting (just a guess) and the finish of the tiles might stain. I've been caught out on matt finish tiles before...
 
thanks Tony, good shout tht one. I'm no stranger to tiling, and have previously done some small metro's in our downstairs loo in matt white with black grout. didnt stain the tiles, just everything else!!

Was going to use a mid-light grey grout and will definately get some to test. Any particular grout recommendations for a wetroom floor, and i assume as far as staining goes, they are all much of a muchness?
 
Make life easier on yourself Al, use a larger format 😊
Just to play devils advocate for a change.

13B8CACD-37D5-4D1B-97CA-BD41D719FEFB.jpeg
 
Trust Marc to suggest larger tiles 🤣🤣.

However you will be looking to set around 540 tiles on the floor alone if it's around 9sqm.

As for grout you could go down the epoxy route depending how brave you are and staining shouldn't be an issue. You could use regular grout and seal it at regular intervals also. Personally I prefer to use tilemaster grouts. They have a range of greys available
 
How you getting on with this now @al strachan ? Must be time to give us an update 😀

Hi Tony, busy with the day job (some might say I should just stick to it!) but have managed to squeeze a couple half days in 🙂

I’m using keraquick that I bought for the bigger tiles, so I’m mixing smallish batches using 1ltr water per batch.From no hurry diy perspective, it gives just enough time to lay a decent patch and sort out cuts between batches.

I’m now at a point where I have no other choice but to tackle the tray. No hiding anymore 😅

wasn’t having any success with the wet saw, so my new porcelain slitting blade arrived today. Seems to be the only way to get an accurate cut for the envelope, helped along with a straight edge.

setting out has worked in fine, with the only compromise being the first fall into the tray being a mix of finished edge and cut edge. Not sure how this will look once grouted, maybe I’m over thinking again? Anyways, it was the only way I could work out the tray without any ridiculous cuts.

some pics below of work to date, and also my setting out and marking of the outside of the tray.

(apologies on behalf of my phone for the photo orientation)
 

Attachments

  • C439104B-DA83-438E-8B78-E9138F2C8991.jpeg
    C439104B-DA83-438E-8B78-E9138F2C8991.jpeg
    85 KB · Views: 73
  • EDF8827A-C1DB-49A7-B027-A39B2EB428E0.jpeg
    EDF8827A-C1DB-49A7-B027-A39B2EB428E0.jpeg
    77.6 KB · Views: 78
  • 41C8B92F-5BB1-45F8-BF66-C355269A749C.jpeg
    41C8B92F-5BB1-45F8-BF66-C355269A749C.jpeg
    90.4 KB · Views: 86
  • BCE596D4-F9F5-4958-9F77-C006114AB57F.jpeg
    BCE596D4-F9F5-4958-9F77-C006114AB57F.jpeg
    130.2 KB · Views: 64
  • 886A7C79-012A-4BB9-8727-9752F3038F02.jpeg
    886A7C79-012A-4BB9-8727-9752F3038F02.jpeg
    79.7 KB · Views: 58
it's looking good Al, maybe just overthinking it but just shows you care about the finish. It will look good when its finished if the remainder is as good as what you have done so far 🙂:thumbsup:
 

Advertisement

Weekly Email Digest

Back
Top

Click Here to Register for Free / Remove Ad