Search the forum,

Discuss DIY Tiler - 90 sq m of large format porcelaine tiling making me nervous! in the DIY Tiling Forum area at TilersForums.com.

P

PJPro

Hi!

I'm having a new extension built on my house. In fact, I've spent today putting in the CAT6 ethernet network (cables and conduit) and bashing through the old gable wall to join the two lofts. But that's another story.

My wife also ordered the 600x400mm porcelaine floor tiles (10mm thick) from Topps. I've got 90 sq metres coming by the end of the week. I am growing more than a little nervous about the laying of these tiles. I've got the porch, hall, dining room and kitchen floors downstairs to do, as well as the downstairs toliet (walls and floor). I've also got the floor and walls of the upstairs bathroom to do.

I'm going to be under pressure to be quick as the other trades are going to be waiting for me to finish before the 2nd fix carpenty and plumbing goes in.

I'm expecting the upstairs bathroom to be a special challenge. It will contain a quadrant shower enclosure with on wall mixer. The bath, basin and toilet will be placed against a low wet wall of about 1m high, containing all the pipework. The basin and toilet will be hung off this wall using Gerberit installation frames and a hidden cistern. The bath has wall mounted taps.

So. My worries. Well, the main one is making sure I'm doing things right.

The floor will be a moisture proof chipboard, topped with hardybacker. Do I need anything else? Should I also put down a waterproof membrane? How about the joints of the hardybacker? Do I need to use waterproof membrane on the walls/floor of the shower? How about the dry lined walls generally? Should I seal them with something like uPVA before tiling?

I've read with interest some of the banter over Sigma and Rubi dry cutters. The 3B or TX-700-N look good. But are these really going to do the business in the hands of a novice like me or should I be looking to buy a wet saw? I've used a (cheap) dry cutter before, many years ago, without much success.

I'm very worried about cutting the hole for the toilet flush plate. It's a fairly large affair (Gerberit - Kappa). How on earth am I going to cut such a big hole in a porcelaine floor tile? Using a jigsaw? :eek:mg_smile:

Clearly, I've got a lot of holes to drill. Are those Porsadrills really my best bet? I was shocked to see that each bit lasts long enough for two holes before it's ready for the bin. I do have a large drill press.....does this give me other options?

I'm fairly practical and can turn my hand to just about anything. I used to be a skilled labourer in my younger years and I am a qualified (but inexperienced) plumber. I'm hoping with a bit of good advice and encouragement I can pull this off. :hurray:

Grateful for any comments.
 
But not the wooden floor....OK. Adds quite a bit to the material cost as the downstairs floor is over half the total area.


Sorry, I'm deffo getting bogged down here, I'll re-read the posts,if you have a mixture of wooden and concrete / screed floors then yes, you'll need a decoupler on the wood and advisable for the screed, and also an expansion joint between and directly over where the substrates meet.
 
P

PJPro

Sorry, I'm deffo getting bogged down here, I'll re-read the posts,if you have a mixture of wooden and concrete / screed floors then yes, you'll need a decoupler on the wood and advisable for the screed, and also an expansion joint between and directly over where the substrates meet.
Apologies Alan.P. I am probably not explaining myself well.

The upstairs bathroom is wood topped out with No More Ply. There are no transitions to any other substrate.

The downstairs, featuring a hall, downstairs cloakroom, dining room and kitchen, is concrete/screed with underfloor heating. There are no transitions to any other substrate.
 
P

PJPro

OK. The tiles arrived today. There's 64 packs each containing 5 tiles. The pallets wouldn't fit through the back gate so I had to lug them through by hand. Man, they're heavy. They're stacked up in the back garden on a couple of pallets and covered with thick plastic sheeting held down with bricks. There were two boxes of tiles which are broken, so I'll have to return them for exchange.

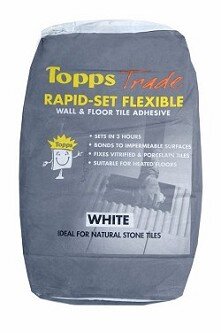
The adhesive is Topps Trader Quick Set White....not BAL. Is this any good? The manager at Topps agreed to swap any bags I wanted to change, so have the option ot upgrade to BAL if I choose....but suspect it would come at a premium. I've been supplied with 20 x 20kg bags.

The grout is BAL Super Flexible Ivory. I've got 5 x 10 kg bags.

I'm going to start laying tiles in the upstairs bathroom later this week so I'd be grateful if someone could answer a few more questions.

Do I need the Dural matting on the floor (chipboard topped with NMP)?

Should I lay the floor tiles first or the walls? I was thinking that I'd prime the walls, fit the waterproof membrane to the walls around the shower and then crack on with the floor.

I am uncetain whether the tiles are covered in transit wax. How can I tell? Do I need to clean the wax off before I lay the tiles or can I do it after I have laid them but before I apply the grout?
 
P

PJPro

M3835_1_DSC_7636.jpg
No, I mean this stuff. Link Toppfix Rapidset Flexible White | Topps Tiles
 
P

PJPro

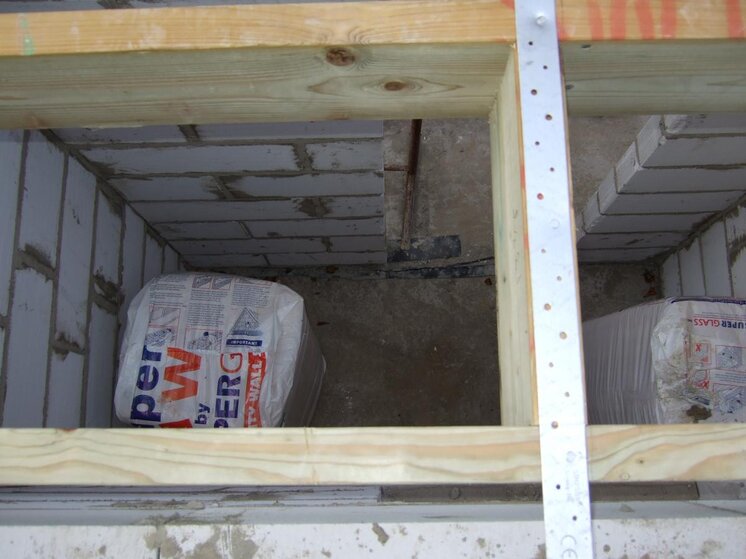
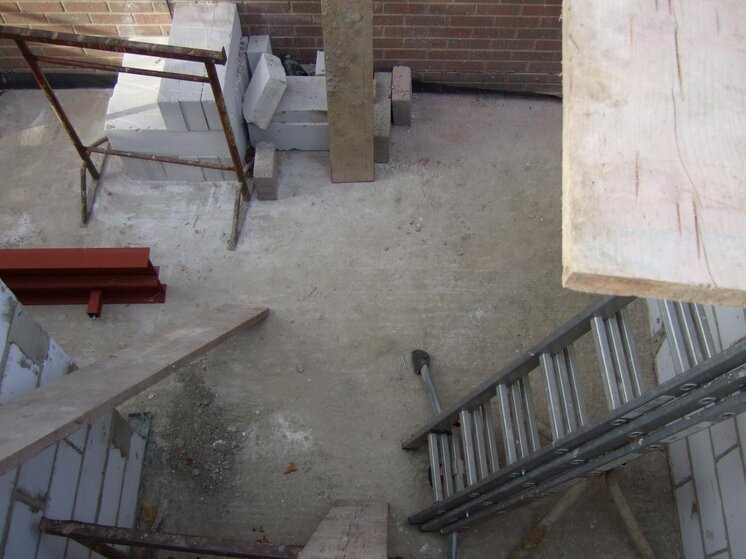
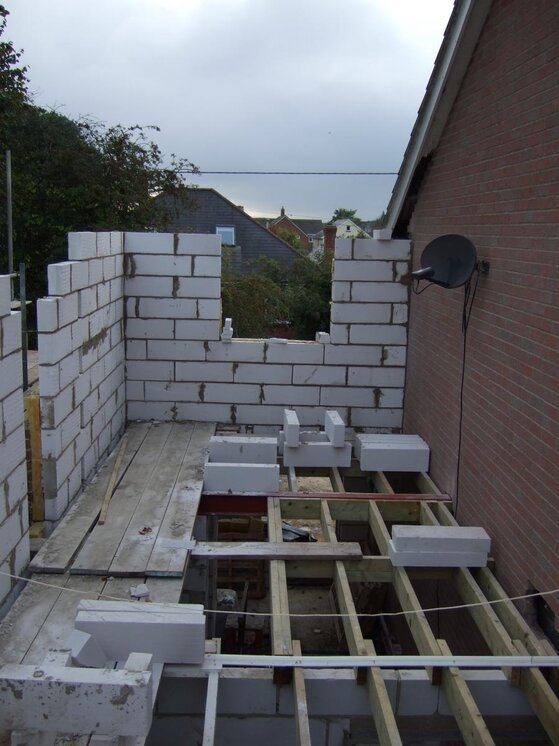
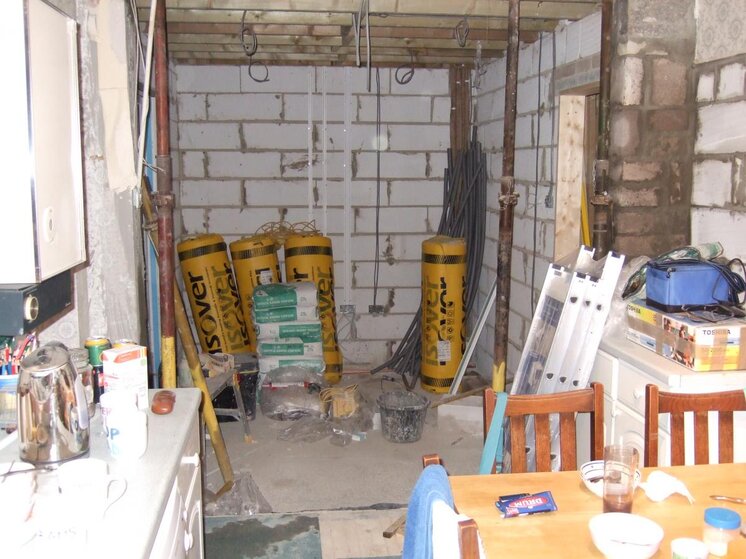
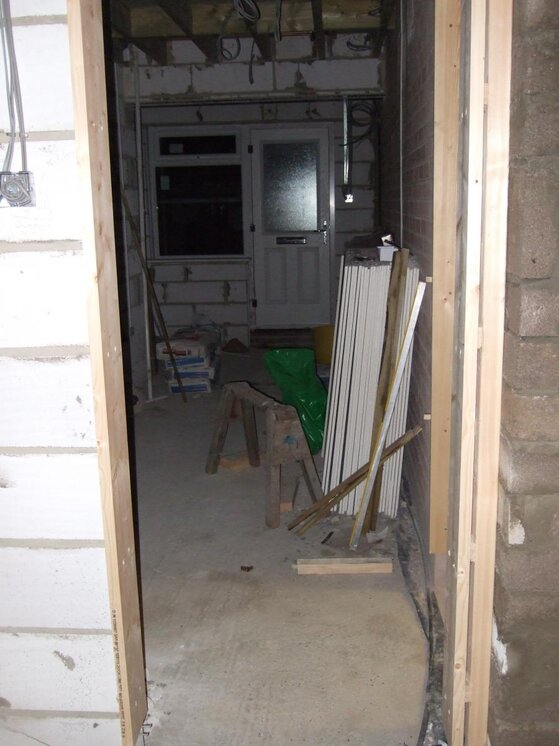
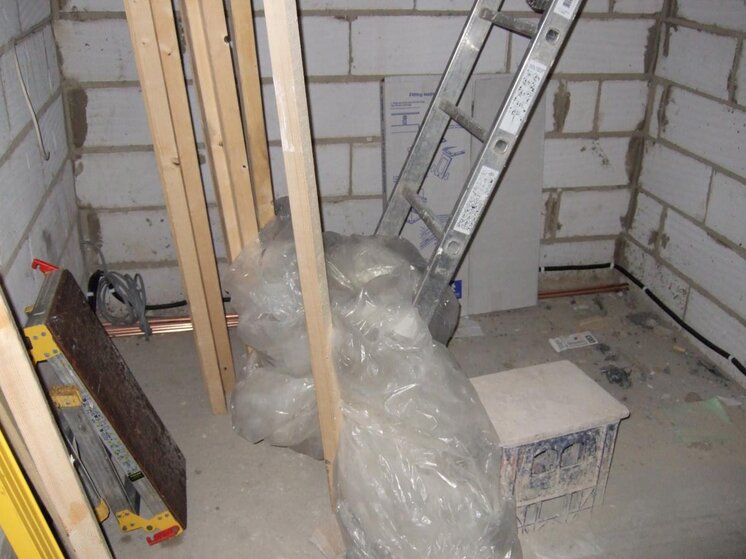
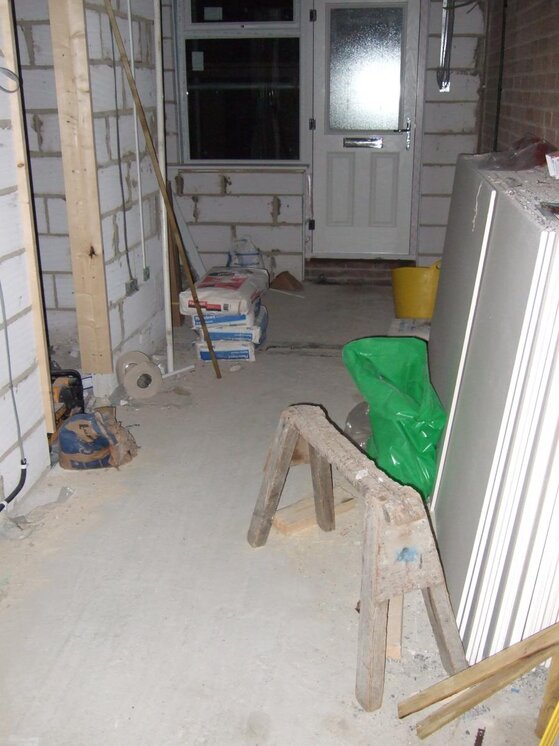
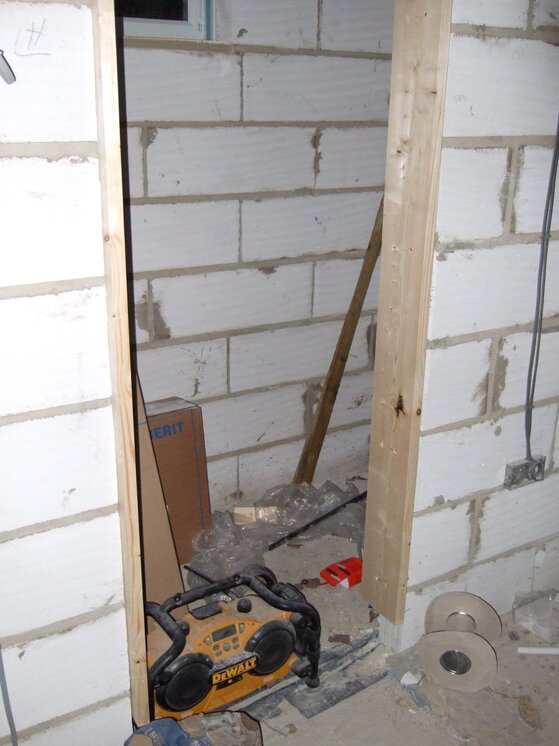
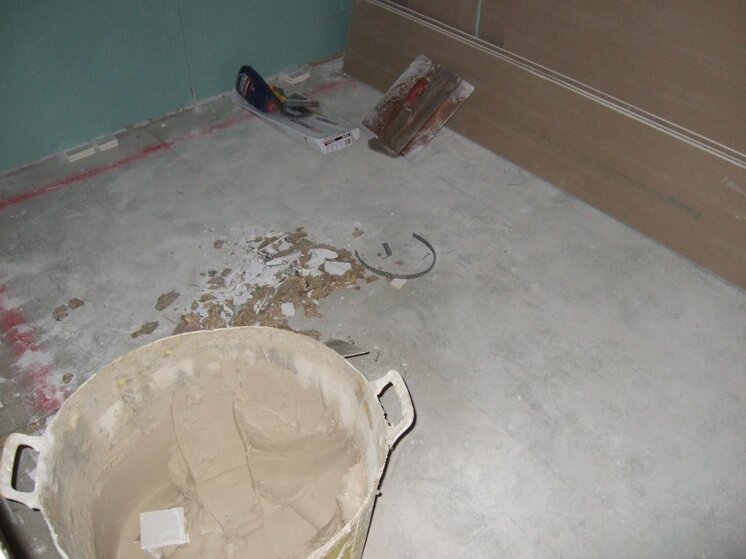
20100928_DSCF7077.jpg 20100928_DSCF7078.jpg 20100928_DSCF7105.jpg

OK. Here's a few pictures to to illustrate the job. The work is more advanced than the pictures might suggest but, unfortunately, I don't have any later photos which are relevant to this thread.

The first picture shows the downstairs cloakroom. It's 2m x 0.8m and around 2.4m high. Clearly, the photo is taken from above. The second picture shows a part of the hallway which will also be tiled on the floor. The final picture shows the upstairs bathroom. It's at the far end of building and starts directly after the red RSJ. It's about 2m x 3m and 2.4m high and is located above the downstairs cloak so that it can share the same stench pipe.
 

mz30

TF
Arms
9
513
liverpool
Not had the chance to read all this thread but have perused it enough(i think).

Honestly and truthfully this job is way to big for a diy job(way to big),the money your going to pay on tools alone,would go a way to paying a pro then the astonomical prices topps charge on top of that,i done a job last week were i knocked £15 per bag off what the client was quoted and still made a little.

I think the money you would have saved hiring a pro,would have outweighed the cost of you doing it yourself(imho).
 

mz30

TF
Arms
9
513
liverpool
wholly agree doug with him comin to the right place,however its hard to explain to a guy next to you the work involved in this project (apprentice etc).never mind explaining it on the internet.

No diy'er in my opinion should take on this sort of project,when the money he has to spend to do the job and the money he has already spent,will outweigh the pitfalls he will hit and regardless of all the info he is given,he will hit problems beyond what he knows .

Pj am not trying to say you shouldnt do the job by any means mate,what am saying is weigh up the consequences,your spending x amount of money on materials ,tools etc,and you have spent time on here asking how you should do said job.

You want a professional finish but given the size of the job and the materials your using,from what i can gather your not confident you can deliver that.
 
P

PJPro

wholly agree doug with him comin to the right place,however its hard to explain to a guy next to you the work involved in this project (apprentice etc).never mind explaining it on the internet.

No diy'er in my opinion should take on this sort of project,when the money he has to spend to do the job and the money he has already spent,will outweigh the pitfalls he will hit and regardless of all the info he is given,he will hit problems beyond what he knows .

Pj am not trying to say you shouldnt do the job by any means mate,what am saying is weigh up the consequences,your spending x amount of money on materials ,tools etc,and you have spent time on here asking how you should do said job.

You want a professional finish but given the size of the job and the materials your using,from what i can gather your not confident you can deliver that.
Well, I'm committed now! Just spent about £800 on tools! :eek:mg_smile:

I'm feeling a little more relaxed about the whole thing. What's the worst that can happen (don't answer that)?

The plasterers have started dry lining in the bathroom. They're putting up green board (a moisture resistant plaster board) in the bathroom with normal stuff elsewhere in the house. We had a bit of a debate about using aquaboard instead for the bathroom but somehow ended up back the green board. They were intending to put a skim over the top but I've asked them not to bother...as I'd have to wait however many weeks for it to dry before tiling.

I'm going to buy some BAL APD primer tomorrow and will slap that on all over the walls. I'll also talk to my local tile shop (who supplies the trade) about suitable waterproofing in the vicinity of the shower. My concern is if I use membrane I'll make the wall thicker due to the adhesive used and it'll give me more difficulties later. If I can get away with it, I'd rather use a paint on solution with tape for the corners, etc.

I'm still not sure if I should be using the matting on the bathroom floor...this question has gone unanswered for some reason....so I guess it's either not needed or requires a complex answer. Clearly, the retailer is gonna want to sell me some so I'll have to make a judgement on the spur of the moment, weighing up the costs against the likely impact of not using the matting.
 
Last edited by a moderator:
P

PJPro

Not had the chance to read all this thread but have perused it enough(i think).

Honestly and truthfully this job is way to big for a diy job(way to big),the money your going to pay on tools alone,would go a way to paying a pro then the astonomical prices topps charge on top of that,i done a job last week were i knocked £15 per bag off what the client was quoted and still made a little.

I think the money you would have saved hiring a pro,would have outweighed the cost of you doing it yourself(imho).
I understand where you're coming from mz30. The pro tiler would have come in at around £3K to do the whole job....and as I've read in many threads on this forum, getting in a pro doesn't necessarily mean a good end result. That said, the guys working on site seem like nice fellas and know their trades, so I suspect the tiler would have been a good guy.....that's why I used the PM that I did....to identify the good tradesmen and avoid the duffers. Sometimes I perceive the work as being a bit, err, sloppy, but most of the time it's just me wanting perfection in areas that don't really matter.

I suspect my attempts at tiling will be far from perfect. But I hope, with the help so generously offered on this forum, I can get the fundamentals right so at worst I end up with a bit of lippage, sloppy cuts and the odd poorly fitting tile rather than tiles falling off the walls or lifting from the floor.

That said, I'm grateful for your concern and welcome your advice.
 
Last edited by a moderator:
P

PJPro

OK. Some more up to date photos taken this evening

DSCF7567.jpg Looking from the kitchen into the dining room. This whole area will be tiled. Hopefully, you can see the door liner on the right. This leads to the hall.

DSCF7571.jpg Looking through from the dining room into the hall. To the left is where the stairs are going in. This whole area will be tiled.

DSCF7573.jpg The stairs will go here. They're being fitted tomorrow.

DSCF7572.jpg Here's another picture of the hall. You'll notice a door liner on the left. This leads into the downstairs cloakroom.

DSCF7575.jpg Here's the downstairs cloakroom. The floor and walls will be tiled.

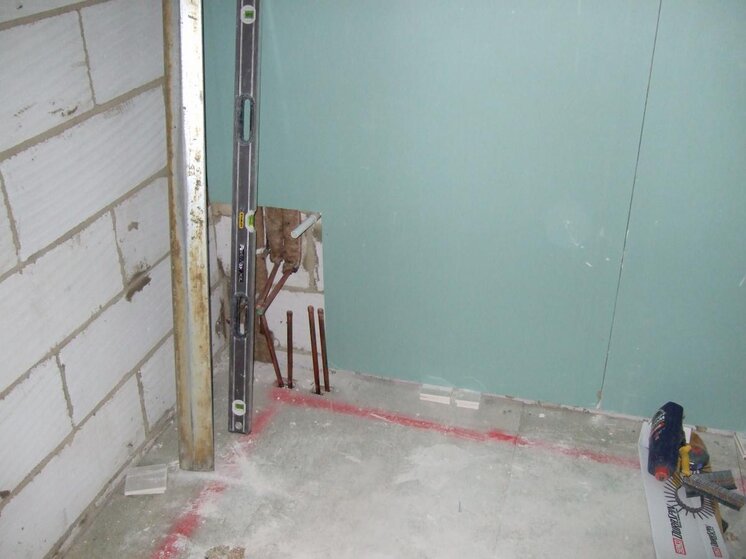
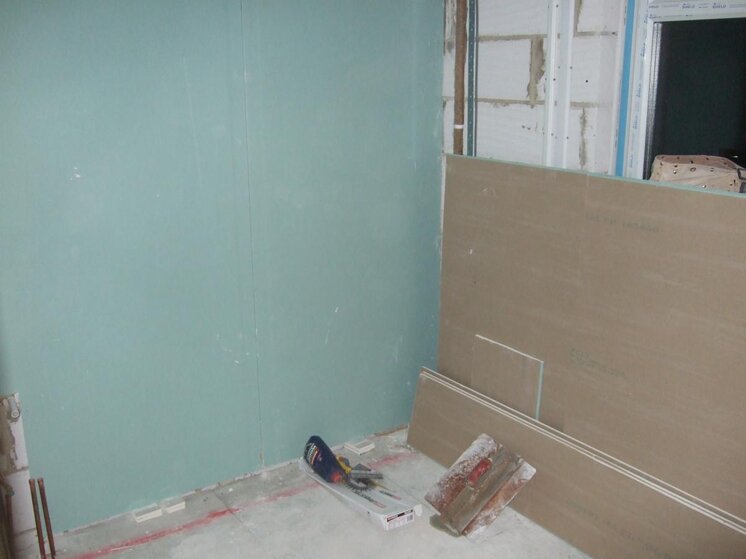
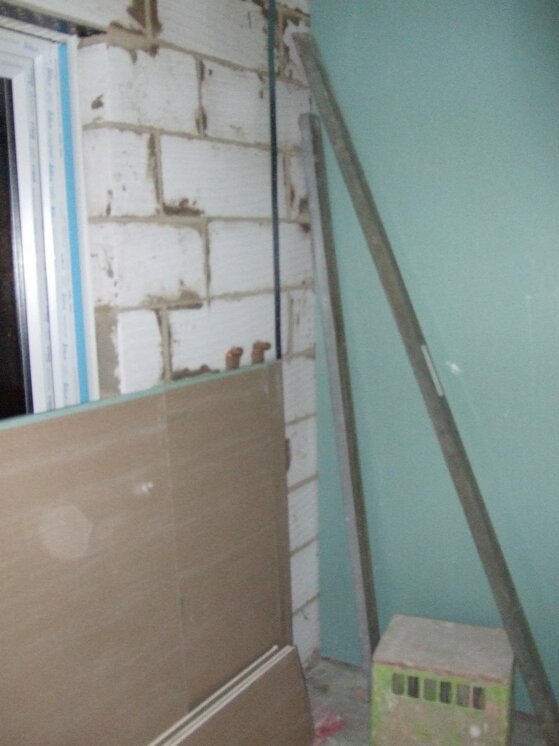
The next few photos show the upstairs bathroom with the green board on some of the walls and the moisture proof chip board on the floor. The NMP has yet to go down on the floor.
DSCF7579.jpg DSCF7580.jpg DSCF7578.jpg DSCF7581.jpg

I've surveyed the walls with a straight end and it seems they are each flat but there's an angle at the join of the boards i.e. they are not true with each other. I'm going to speak with the plasterer tomorrow but I suspect they would ordinarily take this lack of trueness out with the skim coat. It looks like I'm going to have to take it out with adhesive, possibly applying a scratch coat?

I'll see if he can do better on the remaining bathroom walls.
 
Last edited by a moderator:
P

PJPro

I suppose for completeness I should record the tools I've bought for the job.

Cutting Tools
Vitrex - QEP Pro-750 Wet Saw 240v
RUBI TX-700-N
Marcrist CK850 180mm diametre 22.2mm / 25.4 bore
Rubi Ceramic Block
Rubi General Purpose Nippers

Drilling Tools
365Drills Bathroom Fitters Kit
1x 120mm Drill bit only
1x 80mm Drill bit only

Adhesive Tools
Rubi Stainless Steel 'U' Notch
Rubi Stainless Steel 10 mm x 10 mm

Grouting Tools
Rubi soft rubber grouting trowel
Super Hydro Tilers Sponge x 10

Other Tools
Rubi White Rubber Mallet - standard
Adhesive and Grout Whisk
Stanley Chalk Line
Gorilla Tub - Small 14 ltr
Gorilla Tub - Medium 26 ltr
Gorilla Tub - Large 42 ltr

Consumables
3 mm Long leg Cross Spacers x 1000
Red Chalk

Protective Gear
Platinum Knee Pads
Latex gloves - box of 100

Everything was purchased from TradeTiler except for the drills, which I bought from 365Drills.

I have a lot of additional gear already (grinders, drills, drill press, levels, various hand tools, safety gear) so this above does not necessarily reflect what I think I use on the job.
 

Bathfix Bob

TF
Arms
340
588
Are you saying when you offer up the straight edge to the two moisture resistant boards there is a V shaped hollow? Is it just in the middle (tapered edges) or accross the whole boards?

I've done my fair share of plastering and never not got two boards flat with each other when dot & dabbing.

Edit: Ah my 100th post, nearly catching up to you Dave!
 
Last edited:
P

PJPro

I've had a word with the plasterer and, using one of his long straight edges, the boards are almost perfectly flat. I told him "spot on" would be adequate ;-)

The bad news is that the plumber is moving house today and won't be back in until Friday. This means I won't be able to do the setting out to ensure that, for instance, the flushing plate for the wall mounted toilet falls across two tiles, enabling me the cut them. The setting out is actually going to be quite tricky. I need to consider where the tiles will be pierced by pipes, where they will meet the ceiling and where they will meet the doors and windows if I am to avoid silly thin slithers of tile which I will be unable to cut.

In fact, I think the actual laying of the tiles will be fairly straight forward (fingers crossed). From where I sit today, the biggest challenge appears to the setting out, especially as the walls/floor all seem to be more or less flat. I intend to spent a lot of time working out where to place the bottom baton and the vertical alignment of the tiles before I actually commit to laying any tiles. If I get this right, I hope to avoid insurrmountable difficulties later.
 
P

PJPro

Well, I've got the BAL ADP and a BAL Showerkit. The latter was on a special trade deal at The Tile Source (£39?) down from £75. I provided a card from one of the builders on site (with his permission) and got trade prices. Also got some trim but couldn't get a threshold I liked.

I asked about sealant for the grout and they didn't have any. I forgot the tape and the wax remover (doh). I'll use someone more local tomorrow to get the last bits a pieces.
 
P

PJPro

The builders on site are keen to see what sort of mess I'm going to make of the tiling. Clearly, as the client, I've been doing a bit of snagging of their work along the way. This is their opportunity for a bit of payback. It's all in good humour and the foreman has been giving me the benefit of his advice where he can. Apparently, they are going to give me a score out of ten.
 
D

doug boardley

The builders on site are keen to see what sort of mess I'm going to make of the tiling. Clearly, as the client, I've been doing a bit of snagging of their work along the way. This is their opportunity for a bit of payback. It's all in good humour and the foreman has been giving me the benefit of his advice where he can. Apparently, they are going to give me a score out of ten.
:yikes::yikes::yikes:
 
P

PJPro

I've marked out the walls to arrive at the centres and drawn floor to ceiling lines at each centre and the horizontal line all around the wall. I need to make up some guide battens to start sussing out how I'm going to set these tiles out.

Oh, the drills from 365Drills arrived today. Seems they bunged in a free guide with a suction cup for the 80mm bit. It's too small from the 120mm but, then again, I'll be using my drill press for that.

Nothing from TradeTiler yet so I'll be unable to make my guides battens until the delivery arrives including the spacers. I did expect something today.
 

Reply to DIY Tiler - 90 sq m of large format porcelaine tiling making me nervous! in the DIY Tiling Forum area at TilersForums.com

Make sure to mark a post as a solution for better transparency.

There are similar tiling threads here

  • Question
Hi, I'm new to the forum and fairly new to tiling, my only previous "proper" job was my recent bathroom (600x600 porcelain, about 25m walls and floors) which went pretty well. I'm now having a go...
Replies
3
Views
2K
  • Question
Hi all, I've laid some Arditex NA over the kitchen floor area (not under cabinets. The area is 4.5m x 1.8m. The top third of the room is totally level. The remainder of the room has a slope...
Replies
3
Views
1K
    • Like
  • Question
Hi, Can't seem to find a solid answer as I realise so much depends on multiple factors. I'm planning to tile my kitchen floor with 8mm porcelain floor tiles (660x440mm). My kitchen floor is...
Replies
0
Views
2K
Posting a tiling question to the forum? Post in Tilers' Talk if you are unsure which forum to post in. We'll move it if there's a more suitable forum.

Advertisement

Top