
Discuss give us a top tiling tip, please in the UK Tiling Forum area at TilersForums.com.
 It's a good way to use up that random bag of sanded grout that's leftover from another job.
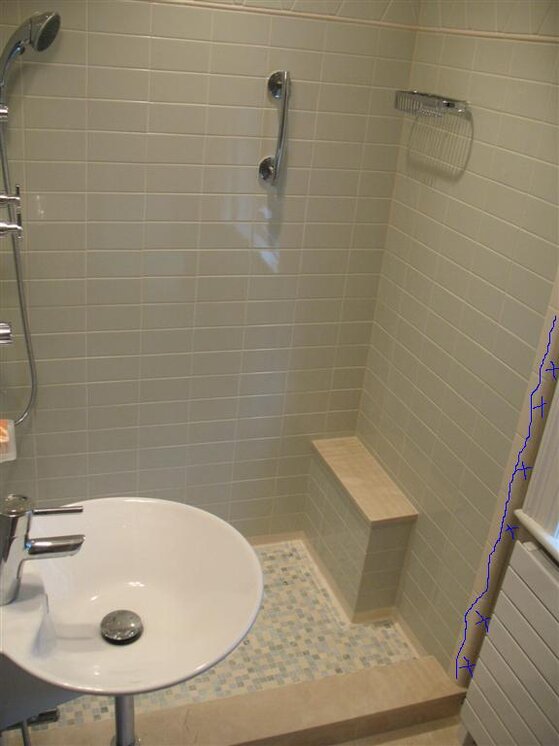

Reply to give us a top tiling tip, please in the UK Tiling Forum area at TilersForums.com
There are similar tiling threads here
Renovated the bathroom on my 1970
bungalow last year. Took up the old pink floor tiles with sds...
I will be tiling with 60*30 procelain tiles. They weight about 3.57kg each which is about...
- poiupp
- UK Tiling Forum
- 2
- 701
I've recently bought Johnson 'Orkney Stone' ceramic floor tiles from B&Q. Paid to have them...
- drowninginit
- UK Tiling Forum
- 6
- 1K
Hope you are well,
We are a new supplier for sealant operating in the central London.
As of...
- Gurjeevan
- America Tile Forum / Advice Board
- 1
- 1K
Looking for some technical advice on these tiles please.
Our installers fitted this CaPietra...
Trending UK Tiling Threads
-
 Public Thread!: Poor Tiling Workmanship by DIY and Rogue TradersPublic Thread!: Poor Tiling Workmanship by DIY and Rogue Traders This is a public thread. So...
- Started by Dan
- Replies: 540
- Tiling Rates Per Square Meter - How much does tiling cost?Tiling Rates Per Square Meter / Per Day – How much do tilers charge? I know this is a hard...
- Started by Dan
- Replies: 311
- DRemoving Old Tile Adhesive From FloorWe've started lifting the ceramic kitchen floor tiles ready to start laying the new ones...
- Started by dfuk121
- Replies: 10
- PHelp! Tiled wetroom floor looks perfect but grout doesn't dry out!We had a wet room installed about 8 months ago. The floor is tiled with large 60x60cm porcelain...
- Started by Paula
- Replies: 221
- UBlack Limestone Paving Nightmare!!!!! Please help!!!!Hello, I have just laid black indian limestone in my garden. I am halfway through grouting it...
- Started by Unregistered
- Replies: 27
UK Tiling Forum Popular
- Tiling Rates Per Square Meter - How much does tiling cost?Tiling Rates Per Square Meter / Per Day – How much do tilers charge? I know this is a hard...
- Started by Dan
- Replies: 311
- PHelp! Tiled wetroom floor looks perfect but grout doesn't dry out!We had a wet room installed about 8 months ago. The floor is tiled with large 60x60cm porcelain...
- Started by Paula
- Replies: 221
- GRemoving Black Grout Stains?After using black grout on my beige porcelain matt tiles, it's left stains that won't come off...
- Started by gooty
- Replies: 16
-
-
 Tiling charges normal or am I scammed?Hi there, I’m in a bit of a pickle. I hired a tiler to do our tiling and initially he told us...
- Started by Imhomeownerbuilder
- Replies: 3
Advertisement
Thread Information
Birthdays
You're browsing the UK Tiling Forum category on TilersForums.com, the tile advice website no matter which country you reside. Our UK based online tiling forum has 48,000 members and started out in 2006.