T
tfs
Since joining the forums back in 2007, I have read various posts regarding timber door bars and how to make them etc. I have decided to put together a little step by step ‘how to’ guide on making your own Oak door bars/ transition strips.
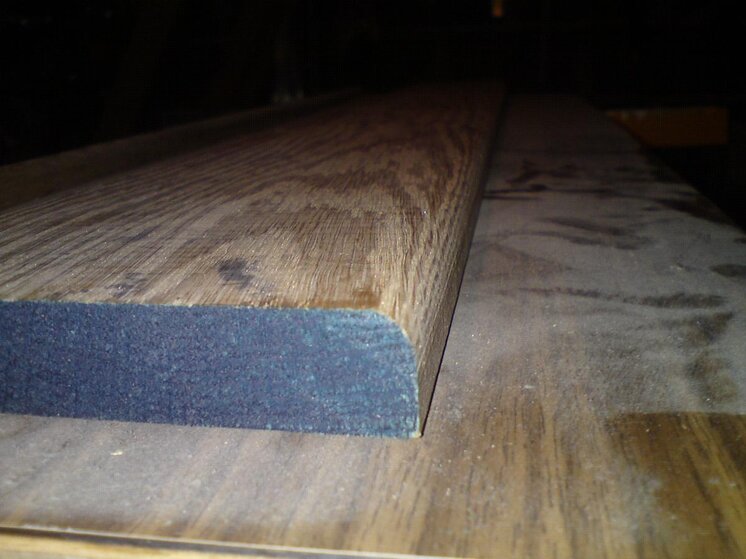
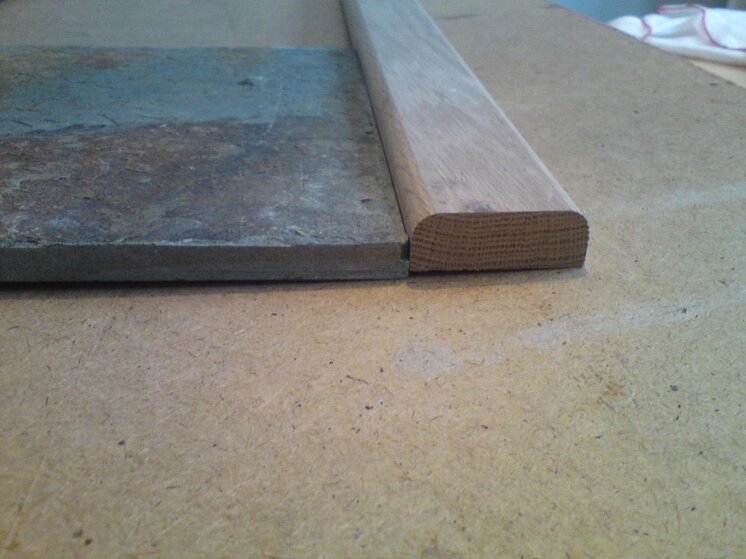
I purchased a 3mtr length of 20x120 Oak (PAR), Planed all round. With this I cut a batton at 900mm. I will use this one batton to show you two types of door bar. One door bar will be flush type with a curved profile on each side and the other will be an over lapping door bar which has a curved profile on both side but also has a rebate on one edge to allow the door bar to sit over the tile.


Step 1. , I cut 900mm off the timber.
Step 2. Select bit to router profile on each top edge of timber (this could even be done with a block plane of by sanding a curved edge with sand paper)
Step 3. Mark the centre of the timber to cut into two strips
Step 4. Cut the timber down the length to creat two strips (I used my festool saw for this, you could also use a hand saw or a table saw)
Step 5. Select rebate bit to router a rebate on the under side of one strip of timber. Mark the depth using a tile as a guage, take underlayment and adhesive into account. (if you don’t have a router you can achieve a decent rebate by passing timber over the table saw a few times adjusting the blade depth and tabl;e fence/guide until you have removed enough timber to form a good rebate)


Step 6. Once you have finished profiling the timber you will need to prepare it for finishing. I preffer to use 120grit sand paper top sand the timber and after this I go over it again with 240 grit to achieve a good finnish. If you need to fill any imperfections in the timber I recommend Metolux a two part fast setting filler .
.
Step 7. Apply a finishing coat to the timber. I preffer to use Patina. Patina is a gel that is used to finnish the decks on boats etc. You could choose to oil the timber instead or any other finnish that you preffer but, I feel that thinks intensifies the grain in the timber and leaves an amazing finnish.

Step 8. Install the door bar. This can be donw many ways which include,
pin to timber floor with 16g brads (apply Silicon to underside of door bar to help bond)
Use plug cutter bit to cut out hole half way through timber, screw fix to substra te and fill hole with a dowel. (specialesr drill bits will be required for this)
On concrete you can stick down with Silicon or adhesives.
On concrete you can also glue and screw using same method described when using plug cutters.
You can install these bard any way you choose dependi ng on the type of finnish you desire. If you don’t need to be subtle when fitting door bar then you could simply just screw/ nail the fixing down.

I hope you find this how to guide usefull, you don’t need specialist tools to make a simple hardwood door bard but if you have them it helps. You will at least need the following;
Tape measure
Pencil
Hand saw
Sand paper or electric sander
Nails or screws
Finnishing oli, gel or varnish
I purchased a 3mtr length of 20x120 Oak (PAR), Planed all round. With this I cut a batton at 900mm. I will use this one batton to show you two types of door bar. One door bar will be flush type with a curved profile on each side and the other will be an over lapping door bar which has a curved profile on both side but also has a rebate on one edge to allow the door bar to sit over the tile.


Step 1. , I cut 900mm off the timber.
Step 2. Select bit to router profile on each top edge of timber (this could even be done with a block plane of by sanding a curved edge with sand paper)

Step 3. Mark the centre of the timber to cut into two strips

Step 4. Cut the timber down the length to creat two strips (I used my festool saw for this, you could also use a hand saw or a table saw)

Step 5. Select rebate bit to router a rebate on the under side of one strip of timber. Mark the depth using a tile as a guage, take underlayment and adhesive into account.
 (if you don’t have a router you can achieve a decent rebate by passing timber over the table saw a few times adjusting the blade depth and tabl;e fence/guide until you have removed enough timber to form a good rebate)


Step 6. Once you have finished profiling the timber you will need to prepare it for finishing. I preffer to use 120grit sand paper top sand the timber and after this I go over it again with 240 grit to achieve a good finnish. If you need to fill any imperfections in the timber I recommend Metolux a two part fast setting filler
 .
.Step 7. Apply a finishing coat to the timber. I preffer to use Patina.
 Patina is a gel that is used to finnish the decks on boats etc. You could choose to oil the timber instead or any other finnish that you preffer but, I feel that thinks intensifies the grain in the timber and leaves an amazing finnish.

Step 8. Install the door bar. This can be donw many ways which include,
pin to timber floor with 16g brads (apply Silicon to underside of door bar to help bond)
Use plug cutter bit to cut out hole half way through timber, screw fix to substra
 te and fill hole with a dowel. (specialesr drill bits will be required for this)
On concrete you can stick down with Silicon or adhesives.
On concrete you can also glue and screw using same method described when using plug cutters.
You can install these bard any way you choose dependi
 ng on the type of finnish you desire. If you don’t need to be subtle when fitting door bar then you could simply just screw/ nail the fixing down.

I hope you find this how to guide usefull, you don’t need specialist tools to make a simple hardwood door bard but if you have them it helps. You will at least need the following;

Tape measure
Pencil
Hand saw
Sand paper or electric sander
Nails or screws
Finnishing oli, gel or varnish

Attachments
Last edited by a moderator:


